The official discord link if you wish to join the discord: https://discord.gg/j5RKwCvAFu
Support the wiki on our official Ko-Fi page or Patreon page!
Maria Renard: Difference between revisions
m |
|||
| Line 338: | Line 338: | ||
==Battle Records== | ==Battle Records== | ||
With ''Rondo of Blood''<br> | With ''Rondo of Blood''<br> | ||
''' | '''27-1-0''' | ||
With ''The Dracula X Chronicles''<br> | With ''The Dracula X Chronicles''<br> | ||
''' | '''29-1-0''' | ||
Combined<br> | Combined<br> | ||
''' | '''56-1-0''' | ||
<tabber> | <tabber> | ||
|-|Victories= | |-|Victories= | ||
| Line 388: | Line 388: | ||
**'''Location:''' Ghost Ship | **'''Location:''' Ghost Ship | ||
*'''[[Shaft]]''' - [https:// | *'''[[Giant Bat]]''' - [https://youtu.be/gsfEhzNR3_o?list=PL01EEA0E9E5893C1B&t=15 Fight]<ref>Castlevania: Rondo of Blood Shaft Boss</ref> | ||
**'''Conditions:''' None. | |||
**'''Location:''' Hidden Docks, Marble Gallery | |||
*'''[[Medusa (Castlevania)|Medusa]]''' - [https://youtu.be/gsfEhzNR3_o?list=PL01EEA0E9E5893C1B&t=37 Fight]<ref>Castlevania: Rondo of Blood</ref> | |||
**'''Conditions:''' None. | |||
**'''Location:''' Hidden Docks, Marble Gallery | |||
*'''[[Mummy Man]]''' - [https://youtu.be/gsfEhzNR3_o?list=PL01EEA0E9E5893C1B&t=57 Fight]<ref>Castlevania: Rondo of Blood Shaft Boss</ref> | |||
**'''Conditions:''' None. | |||
**'''Location:''' Hidden Docks, Marble Gallery | |||
*'''[[The Creature (Castlevania)|The Creature]]''' - [https://youtu.be/gsfEhzNR3_o?list=PL01EEA0E9E5893C1B&t=86 Fight]<ref>Castlevania: Rondo of Blood Shaft Boss</ref> | |||
**'''Conditions:''' None. | |||
**'''Location:''' Hidden Docks, Marble Gallery | |||
*'''[[Shaft]]''' - [https://youtu.be/gsfEhzNR3_o?list=PL01EEA0E9E5893C1B&t=108 Fight]<ref>Castlevania: Rondo of Blood</ref> | |||
**'''Conditions:''' None. | **'''Conditions:''' None. | ||
**'''Location:''' Hidden Docks, Marble Gallery | **'''Location:''' Hidden Docks, Marble Gallery | ||
| Line 442: | Line 458: | ||
**'''Location:''' Stage 5': Hidden Docks | **'''Location:''' Stage 5': Hidden Docks | ||
*'''[[ | *'''[[Giant Bat]]''' - [https://youtu.be/Im1JxiDJYtk?list=PL5BD08842BFB0CB64&t=45 Fight]<ref>Castlevania: The Dracula X Chronicles</ref> | ||
**'''Conditions:''' None. | |||
**'''Location:''' Stage 6: Marble Gallery | |||
*'''[[Medusa (Castlevania)|Medusa]]''' - [https://youtu.be/Im1JxiDJYtk?list=PL5BD08842BFB0CB64&t=84 Fight]<ref>Castlevania: The Dracula X Chronicles</ref> | |||
**'''Conditions:''' None. | |||
**'''Location:''' Stage 6: Marble Gallery | |||
*'''[[Mummy Man]]''' - [https://youtu.be/Im1JxiDJYtk?list=PL5BD08842BFB0CB64&t=120 Fight]<ref>Castlevania: The Dracula X Chronicles</ref> | |||
**'''Conditions:''' None. | |||
**'''Location:''' Stage 6: Marble Gallery | |||
*'''[[The Creature (Castlevania)|The Creature]]''' - [https://youtu.be/Im1JxiDJYtk?list=PL5BD08842BFB0CB64&t=159 Fight]<ref>Castlevania: The Dracula X Chronicles</ref> | |||
**'''Conditions:''' None. | |||
**'''Location:''' Stage 6: Marble Gallery | |||
*'''[[Shaft]]''' - [https://youtu.be/Im1JxiDJYtk?list=PL5BD08842BFB0CB64&t=206 Fight]<ref>Castlevania: The Dracula X Chronicles</ref> | |||
**'''Conditions:''' None. | **'''Conditions:''' None. | ||
**'''Location:''' Stage 6: Marble Gallery | **'''Location:''' Stage 6: Marble Gallery | ||
Revision as of 15:32, 1 January 2025

|
"Mature Content" |
| This character or verse has mature themes and concepts, thus those of young age are ill-advised to look through these. |
| “ | I don't know what you mean, but I know you hurt a lot of people. No matter what you say, that's wrong! | „ |
| ~ Maria Renard to Count Dracula |
Background
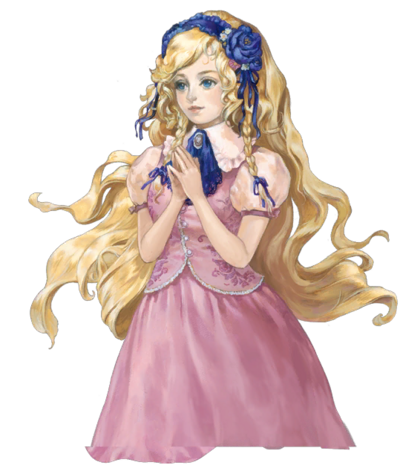
Maria Renard was a young woman born of the Renard Clan in the small town of Aljiba. Despite only being 12 years old, Maria was extremely talented in combat and was able to harness powerful animal spirits to help protect her. Her Clan was a legendary Clan that had once assisted the powerful Belmont family; granting Desmond Belmont doves to help him fight. Maria herself is even a Belmont.
However, one day, Aljiba was raided by Dracula’s forces upon his resurrection, and she, along with several other female villagers, were kidnapped and locked away in Dracula’s Castle. Thankfully, rushing in as fast as he could, the prodigious Richter Belmont came to rescue everyone.
Upon rescuing Maria, Richter insisted that she head back to the safety of the town, but she refused. Knowing that she could be of incredible help to Richter, Maria pleaded that she come along until he finally gave in and allowed for her to. Becoming a pair, Maria and Richter tore their way through Dracula’s Castle even faster than before.
At last, the two made their way into Dracula’s Throne room, where Maria stood back while Richter faced off against the Dark Lord. She pitched in sometimes to help heal Richter and empower him, finally allowing for Dracula’s defeat.
With the Dark Lord finally being defeated, Richter and Maria fled the castle as it crumbled behind them. The fight was over, and everyone was saved. Three years would pass, and Maria would continue her training as a vampire hunter.
One day, however, Maria sensed unease among her animal companions, and ventured into a forest to get answers. Before she knew it, a time vortex appeared before her and she was sucked in. A mysterious man named Aeon appeared, telling Maria of a plot by Galamoth, who has summoned a creature called the Time Reaper to destroy the Castlevania Timeline.
Agreeing to stop anything that she viewed as evil and a threat to the existence of her friends, Maria fought her way through the Time Rift, and faced off against several legendary fighters; including the ancestors of her friend Richter, Simon Belmont and Trevor Belmont. At last, she was able to face off against the Time Reaper itself, slaying it and concluding Galamoth’s evil plot.
Maria was sucked back through the Time Rift and returned to her own time, only to find that Richter Belmont had mysteriously vanished. Nearly two years passed since Richter’s disappearance, and the 17 year old Maria was quick to notice that Dracula’s Castle had risen once again.
Feeling that this may be linked to Richter’s disappearance, Maria ventured into the Castle, and ran into a man named Alucard. Maria found Alucard extremely mysterious and intriguing, thankful for his help but also developing some feelings for him. Before anything could be done, however, Alucard found Richter, and discovered that he had been placed under the possession of the dark priest Shaft, who made Richter become the Dark Lord of Dracula’s Castle.
Alucard fought Richter in an intense battle, managing to defeat him and free him from his possession. While Alucard went ahead to face off against Count Dracula, Maria took the shaken Richter and brought him outside of the Castle.
Once Alucard killed Dracula and the Castle started to crumble away, he appeared to Maria and Richter to say his parting words. However, Maria had developed feelings for Alucard, and chased after him after encouragement from Richter.
Maria’s future is completely unknown, although it is likely that her feelings for Alucard were unrequited. She would nonetheless go down in history as a powerful vampire hunter, on the same caliber as a member of the Belmont Clan.
General Information
Name: Maria Renard[1]
Origin: Castlevania: Rondo of Blood
First Appearance: Castlevania: Rondo of Blood
Latest Appearance: Castlevania: Grimoire of Souls
Company: Konami
Creator: Hitoshi Akamatsu, Koji Igarashi
Actor
- Japanese Voice Actor: Yoko Teppouzuka (Rondor of Blood), Hekiru Shiina (Young Maria, Symphony of the Night), Chisa Yokoyama (Adult Maria, Symphony of the Night), Sawa Ishige (The Dracula X Chronicles), Miyu Matsuki (Judgment), Chiwa Saito (Harmony of Despair)
- English Voice Actor: Kimberly Forsythe (Symphony of the Night), Michelle Ruff (Symphony of the Night & The Dracula X Chronicles), Philece Sampler (Judgment & Harmon of Despair)
Sex: Female
Sexuality: Heterosexual
Pronouns: She/Her
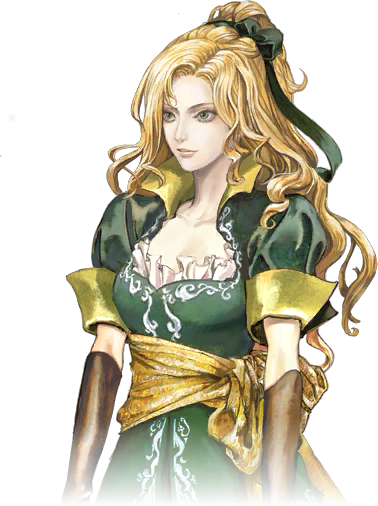
Age: 12 years old in Rondo of Blood (Listed as 12 years old in the Dracula X Chonicles game manual[2]), 15 years old in Judgment (Listed as 15 years old during the events of Castlevania Judgment[3]), 17 years old in Symphony of the Night (Takes place 5 years after the events of Rondo of Blood/The Dracula X Chronicles[4]), 18 years old in Nocturne of Recollection (A year has passed since the events of Symphony of the Night[5])
Homeworld: Earth
Residence: Unknown
Story Role: Main Protagonist
Classification: Relative of the Belmont Clan
Species: Human
State of Being: Regular
Physiology: Humanoid Physiology
Occupation: Vampire Hunter
Affiliations: Richter Belmont, Annette, Alucard
Enemies: Dracula, Death, Shaft, Magnus
Height: 155 cm during Castlevania Judgment[7]
Weight: Unknown
- During her Time: Alive
- Modern Time: Deceased (As she existed back in 1700s, she is naturally dead from old age)
Date of Death: Unknown
Alignment: Neutral Good (Put her life on the line to defeat Dracula, even when she was a kid, and later did so again as an adult. Maria is noted by Shaft to have much purity[8]. Dracula even notes even as the world decays innocence like Maria still exists[9]. Maria does not regret her immense powers robbing her of a normal life as she can use it to protect her loved ones and would rather focus on using her powers to help those in need[10])
Protection Level: Global Protector (Leon started a legacy of the Belmont clan to hunting the night[11]. Fought and defeated Dracula, where in Castlevania III: Dracula's Curse, Dracula plans to take over all of Europe[12], proceeded to amass an army to kill hundreds of soldiers to take over Europe, plagued the beautiful land located in the Southern Part of Romania into darkness by having devils attack it, planned to spread his evil grip to the rest of Europe[13])
Codex Statistics
Key: Dracula X Chronicles | Symphony of the Night
Key Information
- Dracula X Chronicles: This key covers Maria during the events of Dracula X/Rondo of Blood/Dracula X Chronicles.
- Symphony of the Night: This key covers Maria during Symphony of the Night.
Grade: S (Shaft noted that Maria holds much power[14]. Eric Lecarde notes that Maria's power surpasses even that of a Belmont[15]) | S
Tier: At least 7-C, Higher with Iris's Charm | At least 7-C
Cardinality: Finite
Dimensionality: 3-D
Attack Potency: At least Town level (Potency) (Can fight and defeat 1700s Dracula[16], Dracula also serves as the absolute evil, the opposite to God[17], where for God to be perfectly good, there must be a being of perfect darkness[18], being the entity opposite to God[19], with such power making him far superior to Golem from Castlevania Judgment, as he died to a random unknown hunter after his return from the time rift[20]. Golem with his ultimate can shoot out a mouth blast that vaporizes everything it touches as far as the eye can see getting these results[21]. Can harm and fight against enemies stronger than characters who can take hits from neutron bomb[22], that have a yield range of 1-10 kilotons of TNT), Higher with Iris's Charm (The power of Iris's chamr will let one destroy crystal walls[23]), Far Higher with Sheer Will (Simon claims that the Belmonts and Morrises did not defeat Dracula because of the Vampire Killer, with the reason behind heroes' capacity to fight against evil lying not in their physical strength but the noble desire to drive away evil and usher in all that is good, the desire to protect the world for all of humanity, with the courage to fight to protect others being the true essence of a hero and a Belmont's strength, with this even applying for other heroes such as Shanoa, Maria, Charlotte, and even Arikado[24]. Alucard notes that having something to protect surpasses the limits of strength[25]) | At least Town level (Potency), Far Higher with Sheer Will
Durability: At least Town level, Far Higher with Sheer Will | At least Town level, Far Higher with Sheer Will
Striking Strength: At least Town Class (Potency), Far Higher with Sheer Will | At least Town Class (Potency), Far Higher with Sheer Will
Lifting Strength: At least Class 10 (The Belmonts are known as the most powerful and renowned vampire hunters within the world of Castlevania[26], during and before Trevor's time[27], the Belmont's were feared because of their immense power[28], which should make them superior to Hector's Battle-Type innocent devils who can move entire tree logs that are blocking roads out of the way[29] where logs can weigh around 15 to 5 tons[30] and Hector's battle-type innocent devils can lift open large iron doors that "no man could force open"[31]), Far Higher with Sheer Will | At least Class 10, Far Higher with Sheer Will
Travel Speed: Superhuman regularly (Comparable to Leon Belmont, who was able to escape Walter's Castle while running from the top floor to the entrance, before the entire structure collapsed[32]). At most Faster Than Light through full Aura (Comparable to Juste Belmont where Juste travels so fast that a light projection of him is left behind, enveloping with a blue aura around him[33]), Far Higher with Sheer Will | Superhuman regularly. At most Faster Than Light through full Aura, Far Higher with Sheer Will
Attack Speed: At most Faster Than Light (Can tag 1700s Dracula, who serves as the absolute evil, the opposite to God[34], where for God to be perfectly good, there must be a being of perfect darkness[35], being the entity opposite to God[36], making him faster then enemies such as the Sky Fish who moves so fast that it appears as a beam of light and is only slowed down when time is stopped[37] and the White Demon, who can move at the speed of light at short distances[38]), Far Higher with Sheer Will | At most Faster Than Light , Far Higher with Sheer Will
Reaction Speed: At most Faster Than Light, Far Higher with Sheer Will | At most Faster Than Light, Far Higher with Sheer Will
Stamina: Superhuman+ (Just like Richter, Maria fought through Dracula’s Castle before defeating Dracula himself. She was then able to fight through Dracula’s Castle a second time in order to find Richter’s whereabouts)
Range: Standard Melee, Extended Melee with Staff, Tens of Meters with animal spirits
Intelligence: Genius Intelligence (Able to utilize sub-weapons that possess great attack and power which in Castlevania requires one to have a high intelligence to be able to do[39])
Knowledge: Grandmaster level (Can fight and defeat Dracula, where he was a genius tactician as Mathias, who they called "Cronqvist the Wise"[40])
Powers and Techniques
Superhuman Physical Characteristics (The Belmonts are known as the most powerful and renowned vampire hunters within the world of Castlevania[42]. During and before Trevor's time[43], the Belmont's were feared because of their immense power[44]), Acrobatics (Due to Belmonts superhuman nature, they possess very athletic and acrobatic bodies, examples include Richter easily flipping over Death's scythe attack while also jumping around and fighting Death while on a moving horse carriage[45]. Richter also showcases this with his boss fight in Dracula X where he must jump across platforms while also fighting against Dracula[46]. Julius showcasing extreme acrobatic leaps to reach the top of a castle drawbridge[47]), Genius Intelligence (Belmonts are trained and some of the best users of various sub-weapons, which in Castlevania requires one to have a high intelligence to be able to do[48]), Martial Arts (Trevor left behind all of his fighting techniques to each new Belmont clan member and Morris clan member[49]), Weapon Mastery (No matter the Belmont, they have all showcase a natural gift in using weapons, with Christopher showcasing the tools of his family's destiny are always the axe, dagger, cross, & stop watch[50]. Many of the famous Belmont weapons were left behind by Trevor[51], with him noting them to be the axe, dagger, cross, holy water, and stop watch[52]), Sheer Will (The Belmonts are all ones with strong courage and willpower, where having a strong constitution dictates and influences how fast one can recover from status effects such as poison or curse[53]. Belmonts are pillars of strength, willing to keep fighting even when weakened greatly and having their existence slowly erased from history[54]. Simon claims that the Belmonts and Morrises did not defeat Dracula because of the Vampire Killer, with the reason behind heroes' capacity to fight against evil lying not in their physical strength but the noble desire to drive away evil and usher in all that is good, the desire to protect the world for all of humanity, with the courage to fight to protect others being the true essence of a hero and a Belmont's strength, with this even applying for other heroes such as Shanoa, Maria, Charlotte, and even Arikado[55]. The Belmonts will should be greater than even the likes of the Fernandez/Belnades Clan, including Camilla Fernandez, where its noted she had great spirit and struggled mightily against the curse before she became a vampire[56]), Aura (Belmonts release a glow of aura around them[57], that envelops their body[58]), Non-Standard Interaction (Metaphysical Interaction; Belmonts can interact with ghosts with their whips and sub-weapons[59]. Elemental Interaction; Belmonts can interact with enemies that are the mist itself with their whips and sub-weapons[60]. Belmonts can interact with creatures of the night made of sand[61]. Can interact with creatures of the night made of fire[62]. Can fully disperse and destroy water bubbles instead of the attack just going through it[63]. Blood Interaction; Can harm and kill enemies made of blood[64]. Abstract Interaction; Belmonts can interact with and kill Death[65], where Death is death, being the absolute presence, the awe, the religion, and the dark god[66]. He refers to death itself as him[67]. Noting that he is completely death and human death is only a part of Chaos[68]. Olrox when seeing Death fight serious notes that he senses the overwhelming existence of death and states that death really exists[69]), Nullification (Pain Immunity Nullification; The Belmonts can make the White Dragon visibly react to pain[70] and scream out in pain, where it is an immortal being immune to pain and suffering[71]. Abstract Nullification; The Belmonts can nullify and destroy the scythes from Death, who can use his scythes to kill abstractions such as distance and sound[72]. Death decides who lives and who dies[73]), Immortality Negation (Ageless & Life and Death Immunity; The Belmonts can render immortal skeleton death gods like Death, mortal, having him bleed from attacks, giving him mortality as shown when Death dies to his own scythe cutting off his head and having blood spurt out, something not possible as a skeleton[74]. The Belmonts can kill Death to the point that he requires Mathias to survive in order for him to rise from the dead[75]. Death is a being unconstrained by mortality[76]), Resurrection Bypassing (The Belmonts can kill zombies[77], who are corpses brought back to life from the power of hate[78]), Enhanced Senses (Belmonts such as Trevor could sense the power of a Belmont within Simon and also could tell he did not seem to grasp the fundamentals of combat in Judgment's time rift[79]), Extrasensory Perception (Belmonts can feel others being in an area, such as Simon Belmont being able to feel Trevor Belmont is in the time rift[80]. Leon could sense and feel that Joachim Armster was a vampire[81]. Leon could sense the rage from a Vampire Killer[82]. Trevor could sense a bad omen approaching[83]. Christopher Belmont felt a "chill" upon Dracula's return[84]. Belmonts such as Juste could sense Death's overwhelming power[85]. Belmonts such as Juste could sense the aura of the two different layers of the castles[86]. Belmonts can see beings like the Bitterfly, a mutated insect, visible only to magicians[87]. Julius could sense the dark powers within Soma Cruz[88]. Julius could sense Dracula's powers at work within Graham, though could tell from sensing Graham that he very likely was not Dracula[89]. Julius when fighting Soma could feel the evil spirit within Soma but also Soma's good spirit[90]. Belmonts have the ability to sense the presence of beings physical and spiritual that cannot be seen by ordinary humans[91]), Precognition (Premonitions; Belmonts can have future premonitions through their dreams, such as Christopher dreaming about Dracula stealing his son and turning him evil, far before he even had one[92]), Magic (Due to coming into contact with Rinaldo and gaining the whip, Rinaldo granted him a magic amulet[93]. where Leon gained magical energy that would naturally be passed down to all of his descendants[94]. Belmonts such as Julius naturally have magical powers due to this[95], along with Juste having magical powers deriving from the Fernandez (Belnades) family[96]), Principle Manipulation (Magic comes from alchemy, a field that experiments with the principles of God's creation of the world[97]), Afterimage Creation (Belmonts can envelop themselves in an aura of light that allows them to move so fast, their light projections cannot keep up[98]), Glyph Creation & Portal Creation (The Belmont blood acts as a key to[99] the infinite corridor[100]), Empowerment & Holy Manipulation (Belmonts can amplify weapons, Leon holding The Whip of Alchemy had it become more powerful then before, with Rinaldo stating that the whip fits Leon better then it fits him, despite him being the one to make the Whip of Alchemy[101]. Medusa even noted that it wasn't so powerful before believing the whip gained its complete form[102]. Belmonts can call upon the power of the light and use it to amplify their strength to be stronger and faster[103], this is also shown with Trevor Belmont's ultimate in Castlevania Judgment[104]. The Belmonts can use their stored energy (hearts) and transfer it into subweapons to make regular weapons as strong as they are along with magically enhancing them[105]), Invulnerability (Belmonts have an inborn self-defense ability known as "Burning Mode" which makes them invincible and raises their status to twice the normal level[106]), Statistics Boost (Belmonts get stronger from hearing of someone's grief, wanting to help them[107]), Reactive Power Level (As Dracula grows stronger each time he revives, the Belmonts have had to keep up, evolving to be powerful even without the strength of the Vampire Killer[108]), Sealing (Metaphysical Sealing; Belmonts can capture the spirits of enemies equal or greater to an area boss and use their abilities from their soul[109]), Nullification (Sealing Nullification; Belmonts such as Julius can completely destroy barriers, however depending on how strong the barrier is, they may have no more energy to fight[110])
The Castle Abilities Include:
Reality Warping (The Castle does not work on standard logic, where changing rooms can have one view a completely different background[164], such as room with a blue sky that is reflecting up and downwards and having the cloud srotate at a fast speed[165]), Transmutation (Beings that come near are subject to the castle's influence, such as a local barnyard owl which was mutated just from flying near it[166]), Possession (The castle possesses objects with its magic, such as a ouija table[167]), Sealing (Dracula's magic captured Aguni, a primitive god of fire[168]. The Castle has doors sealed off without solving puzzles[169]. This can extend to walls being sealed off where explosions will not affect it until the seal is gone[170]), Mind Manipulation (Everything that enters the castle is under the control by the power of Dracula's castle[171], the ghost of Eric Lecarde needed to cast a magic barrier to bind himself so he could be free from the control of the castle[172]. The Castle corrupts the minds of those who enter it, such as making Maxim Kischine feel strange ever since coming to it[173]. It also corrupted the mind of Hugh turning him against Nathan with Nathan noting he's being controlled by Dracula[174]. The castle increases one's dark desires, allowing Dracula to easily control them[175]. The magic of Dracula's power that empowers the owl enemy also spurs it to violence[176]), Madness Manipulation (The Castle warped Gergoth, a once-gentle beast and drove it mad[177]), Size Manipulation (Magically enlarged a toad through the use of demonic baptism[178]), Fear Manipulation (Even while far away, Curtis and Michelle felt malicious intent from the castle where their bodies seemed to squeal "run away"[179]. Michelle even being at the entrance to the castle had her body telling her to not go in and her leg muscles being petrified like stone[180]), Curse Manipulation (The Curse status that spirits inflict[181] comes from them absorbing the magic power around the castle. The Castle cursed a human to turn into a lizard man[182]), Life Manipulation (The castle can bring inanimate statues to life to attack[183]. Can cause the glass murals to come to life and attack[184]), Soul Manipulation (Those that die in the castle become one of the floating spirits that wander the halls of the castle for eternity[185]), Abstract Manipulation & Hell Manipulation (The castle can create a core of evil made from hatred, envy, anger and other dark emotions[186]), Text Manipulation & Plot Manipulation (The vital souls are noted to be apart of the Castle's power[187], where is noted by Lucy that the "vital soul" of a monster is the cause of the grimoire chaos[188] where creatures of the night's dark powers allowed them to rewrite the Grimoires to strengthen their dark powers greatly[189], along with their vital souls causing the grimoires contents to be overwritten changing history to things such as Jonathan Morris is now at a disadvantage in battle[190], or Charlotte fading from existence due to them messing with the history of the Grimoires[191], Maria starting to fade because Richter's history is being rewritten[192], where if the contents of the book change the creatures magic will keep growing and eventually overflow into reality, causing the grimoire to fall into chaos and even more monsters materializing into the real world[193]. The text alterations also make the monsters stronger[194]. With the real world and world of grimoires being considered the same or "equal"[195], compared to the like of Brauner's painting worlds that are quantum multi-layered spaces requiring understandings of theories such as "Curse Amplification"[196]. Death was going to use Dracula's magic to rewrite Dracula's defeat to Trevor making it where Dracula defeats Trevor Belmont instead where Dracula would go on living in the rewritten grimoire with each grimoire being its own world and the grimoires influence extends into reality[197]), Law Manipulation (The vital souls are noted to be apart of the Castle's power[198], which alter grimoires, which do not adhere to the laws of reality[199]), Power Modification (The vital souls are noted to be apart of the Castle's power[200], which the vital souls cause alterations of the Grimoire that can greatly limit the powers of those far stronger than them, such as Jonathan Morris' power being limited due to the alterations[201]. The Chaos of the Grimoire destabilized the magic of the others[202])
Equipment
Equipment
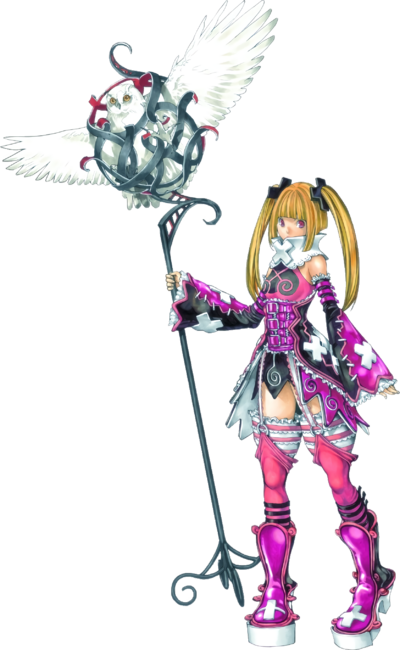
- Staff: A large metallic pole staff with a cage on top, in which Osca the owl resides. Maria uses this to whack enemies.
- Book of Music: Though relatively weak, Maria can use her singing voice as a weapon.
Summons
- Osca: A snow white owl that can channel Maria’s animal spirits, and resides in her pole staff.
- Dove: Maria summons a pure white dove that attacks the enemies in a short range.
- Cat: A small white cat that jumps off of Maria and runs forwards, harming anything in its path.
- Tortoise: Maria crouches down and a large turtle shell falls on top of her, acting as a protective barrier. She can crawl along the floor while the tortoise shell protects her.
- Dragon: Maria summons a small human-sized dragon that flies around and attacks anything in its vicinity. It can also summon large waves to attack.
- Red Bird: This summon has Maria unleash two cardinals above her, which fly around in an arc and attack anything in their path. It can also unleash pillars of flame.
- Egg: Releases a chick when dropped that flies away through the enemy.
Notable Techniques
Normal Attacks
Neutral Combo (B + B + B)

Directional Combo (Left Stick + B + B + B)
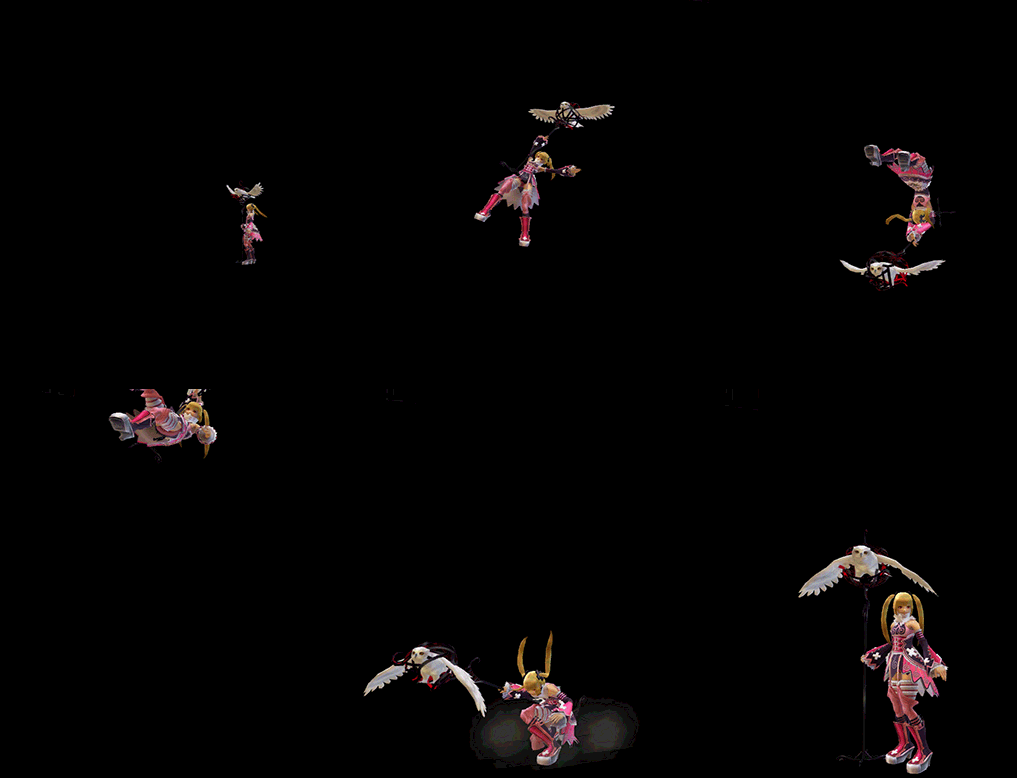
Jumping Attack (Jump + B)
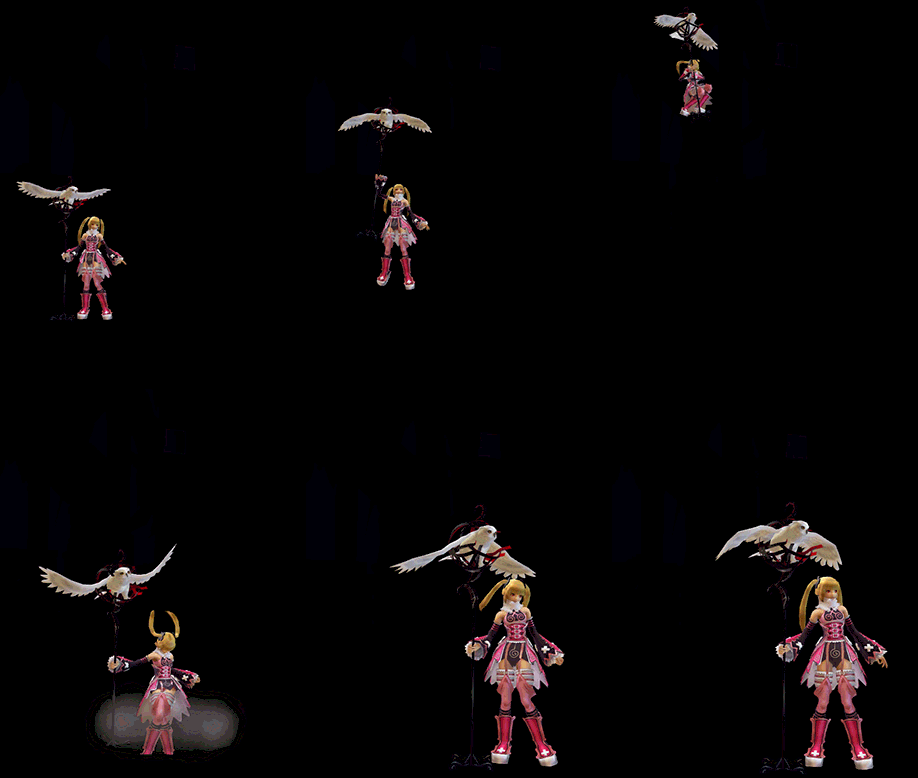
Suzaku Call (A + B)
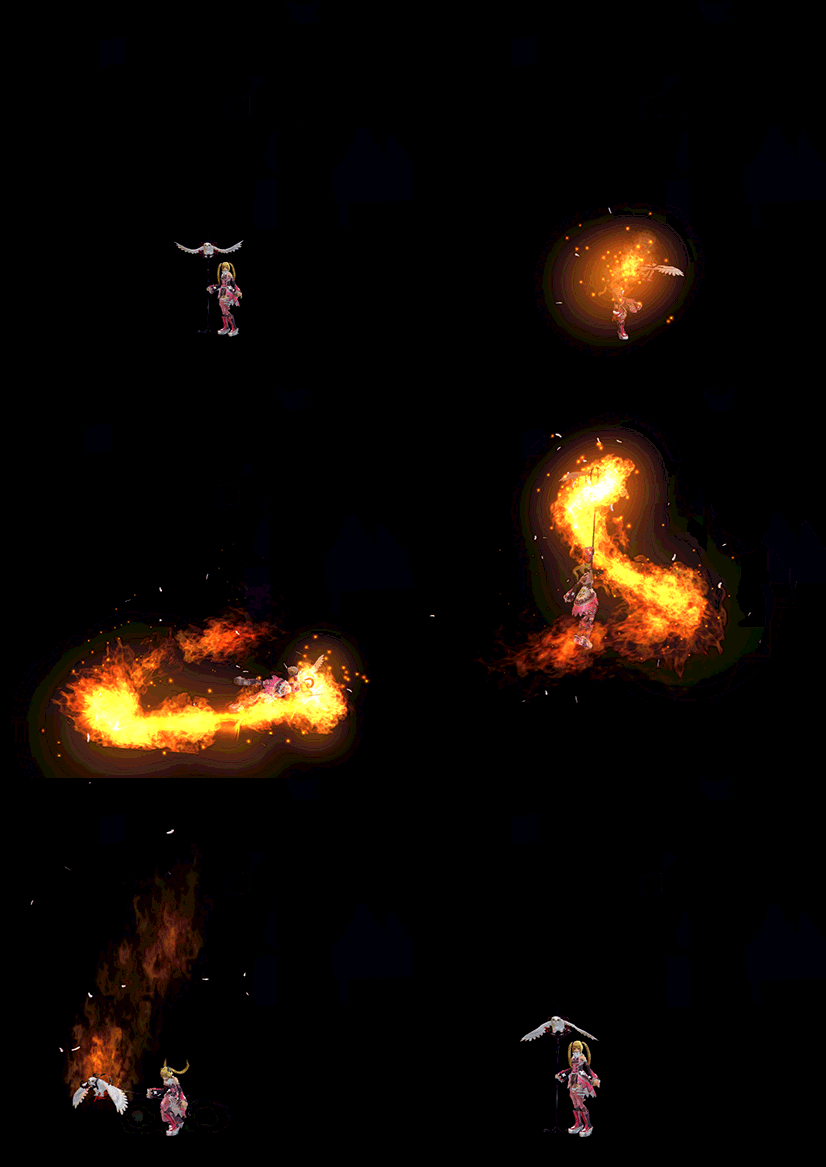
Maria can call Suzaku's name and it imbues her owl with flames. The owl perched inside Maria's cage staff flies and spins Maria around, leaving a large trail of flames in its path.
Genbu Call (Left Stick + A + B)
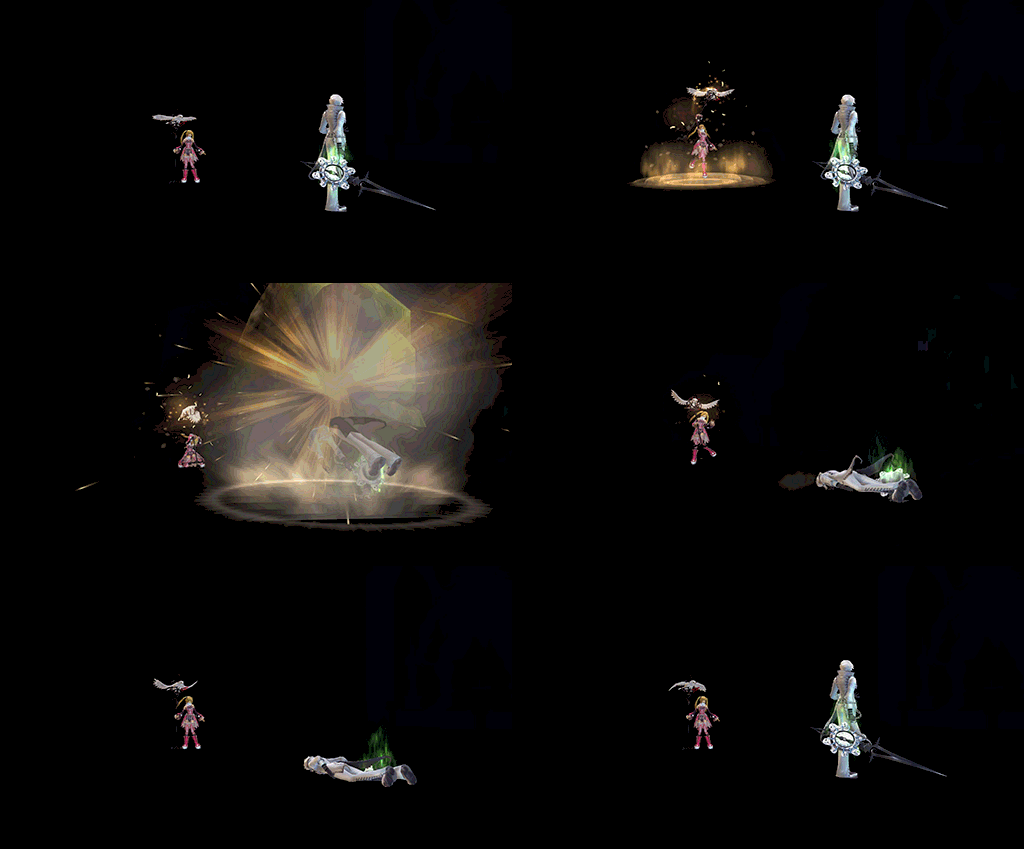
Calls forth a giant turtle shell which falls on her opponent. It is the only attack that does not involve a direct attack by her owl Osca, who instead covers his eyes with his feathers during the whole ordeal.
Byakko Call (A + B)

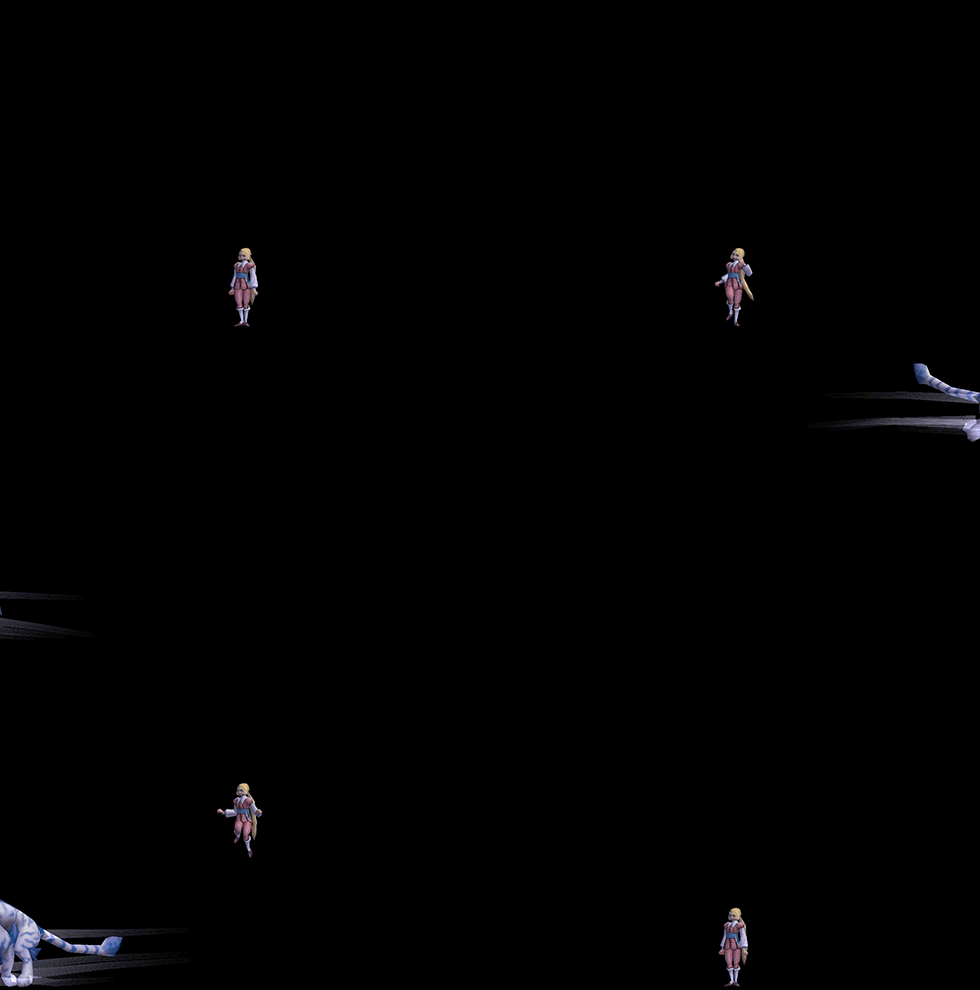
Summons the spirit of the Cat into her owl, Osca, after Maria has jumped. The cat then compels the Owl to dive down to the ground, smashing Maria into the ground in the process.
Hold on a Minute (Right Trigger + A + B)
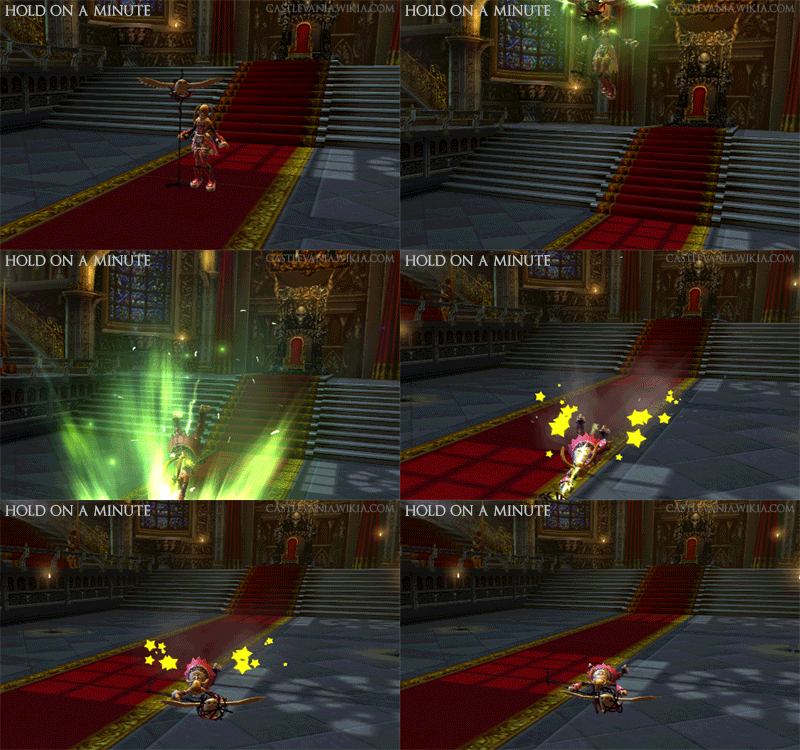
The follow-up to Byakko Call, in which the owl is compelled to fly low to the ground straight forward like a cat running on the ground, running into her opponent.
Seiryuu Call (Charge A + B - also aerial)

Maria imbues the owl with the power of Seiryuu, allowing her to form a massive wave to attack opponents with.
Guardian Knuckle (Left Trigger + B)
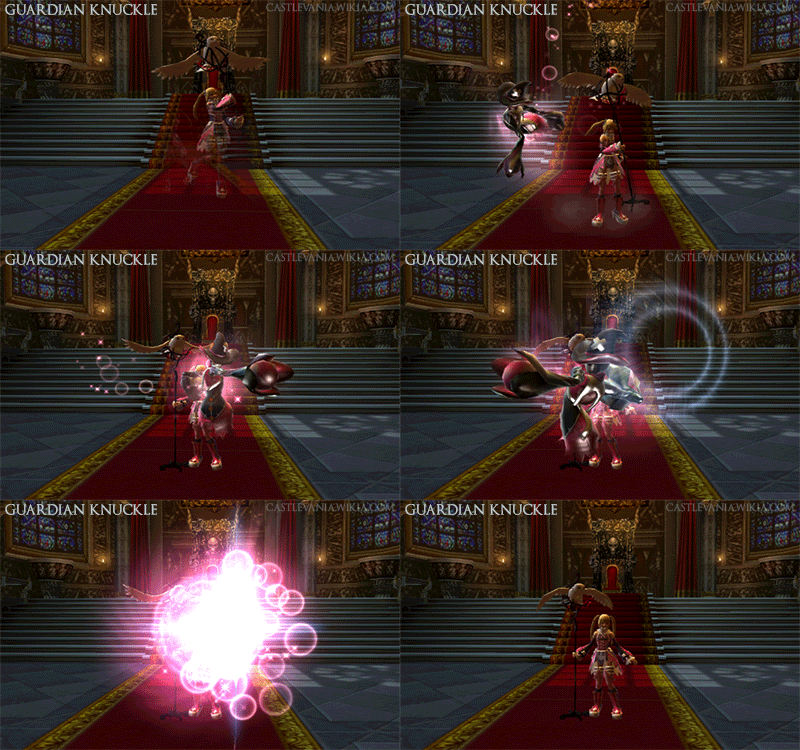
Maria summons a guardian spirit that delivers multiple punches on the opponent. </gallery>
Everybody, All Together Now!

In Castlevania Judgment, Maria Renard’s Super Finisher, "Everybody, All Together Now," sees her channeling the power of the Four Sacred Beasts. As she calls, “Come on everybody, give me your strength,” her owl absorbs their combined might. Maria charges her enemy with the owl in its cage, but the surge of power overwhelms her, causing her to stumble and release it. The owl escapes, rockets through the air, and launches a powerful dive attack on her opponent before landing humorously on her head.
Summon Four Holy Beasts
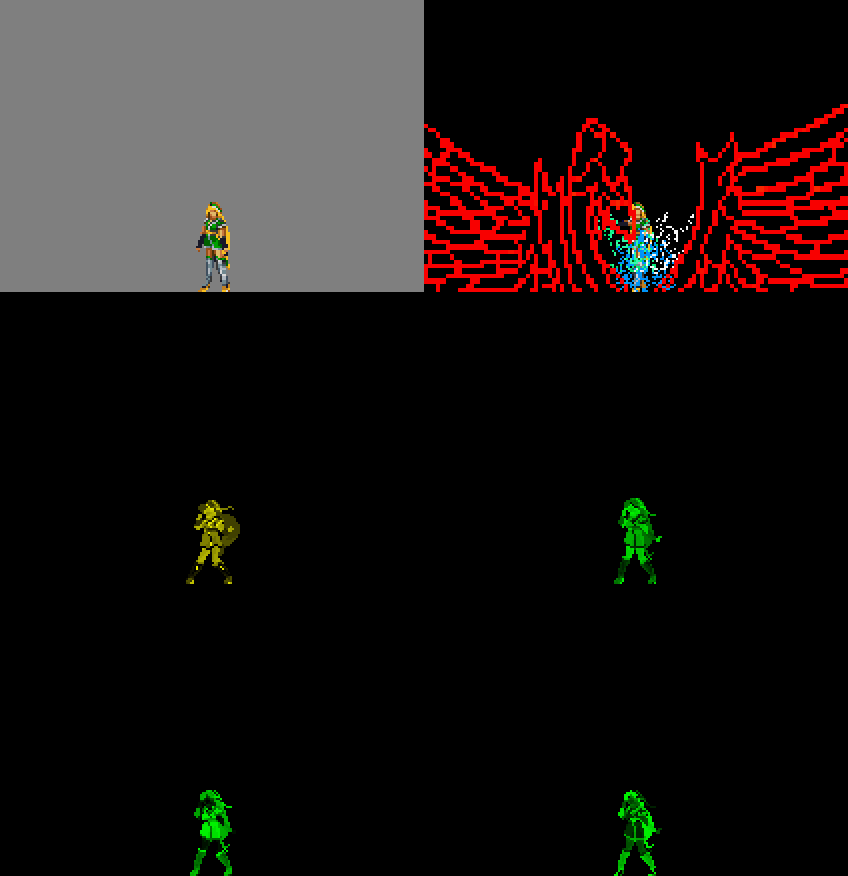
In Castlevania: Symphony of the Night, Maria Renard can summon the Four Holy Beasts—Suzaku, the fire bird; Genbu, the turtle; Seiryuu, the dragon; and Byakko, the white tiger—to grant temporary invincibility to herself or an ally. During the "Final Stage: Bloodlines" prelude, she casts this spell if Richter loses all his health while facing Dracula. Maria continues her prayer throughout the fight, sustaining the spell’s effect, which prevents Richter from taking damage until he defeats Dracula. In the Sega Saturn version, the playable Maria can activate this spell on herself by executing a complex input sequence (↑↗→↘↓↙←↖↑ [hold] ↓ + [ATTACK]). For around 34 seconds, she becomes invincible, inflicting damage simply by making contact with enemies. During this time, her Drop Kick, High Jump, Slide, and sub-weapons deal twice their usual damage.
Item Crashes
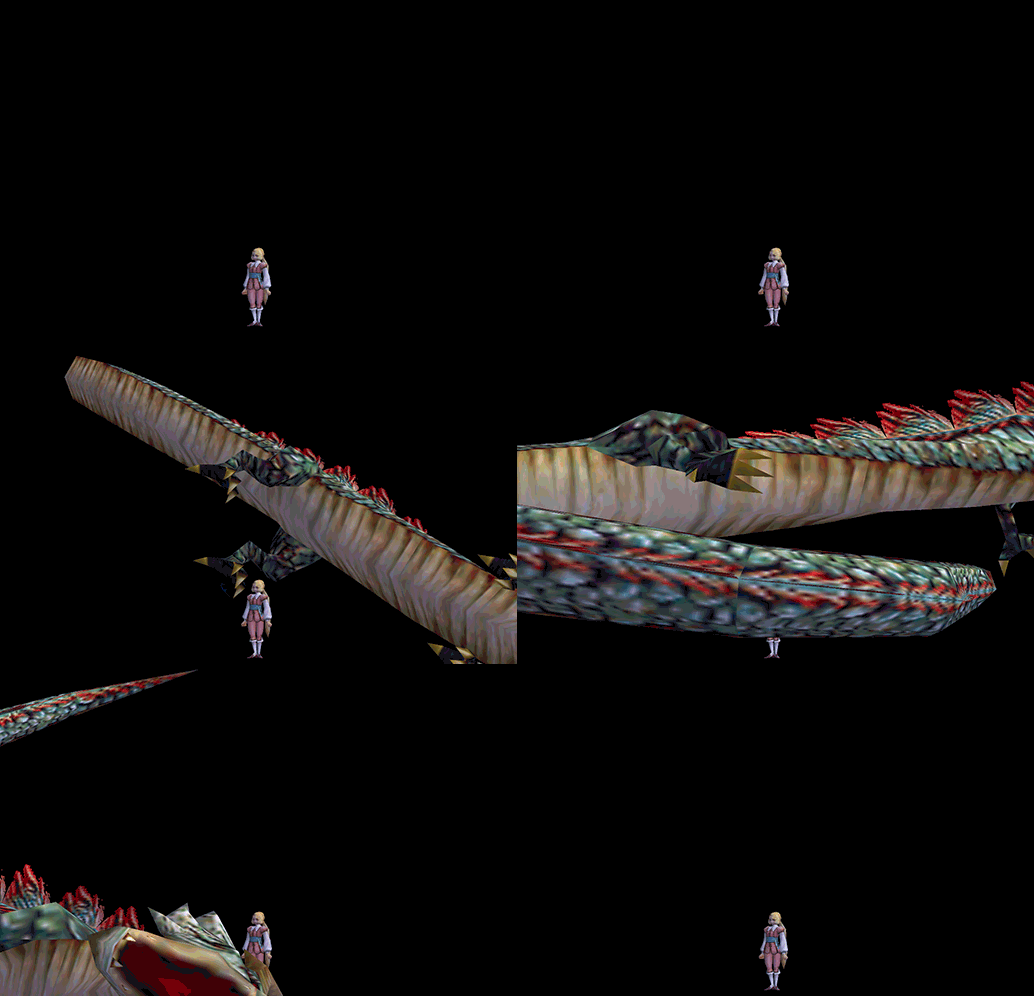
Item Crashes are a technique utilized by Maria that allow her to use special attacks with her sub-weapons. Performing an item crash takes more hearts then normally taken from the subweapon however in return the attack is capable of killing most enemies and greatly reducing a boss' health.
The item crashes are as follow:
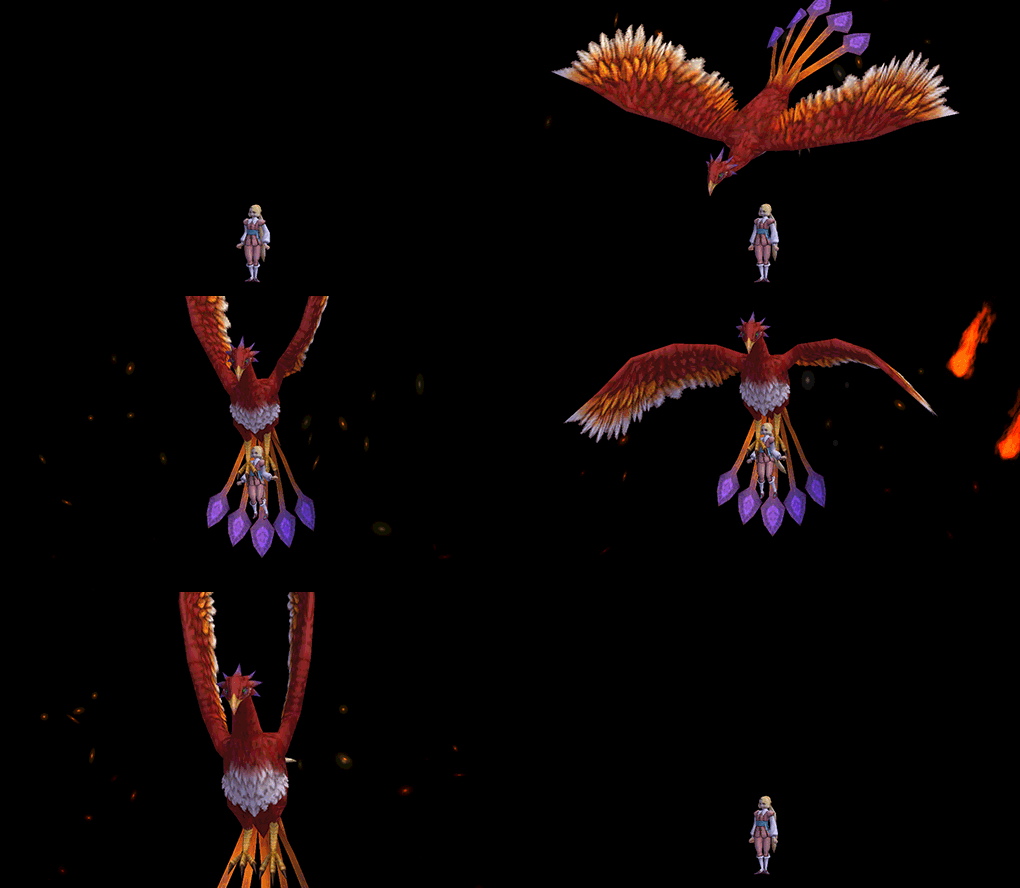
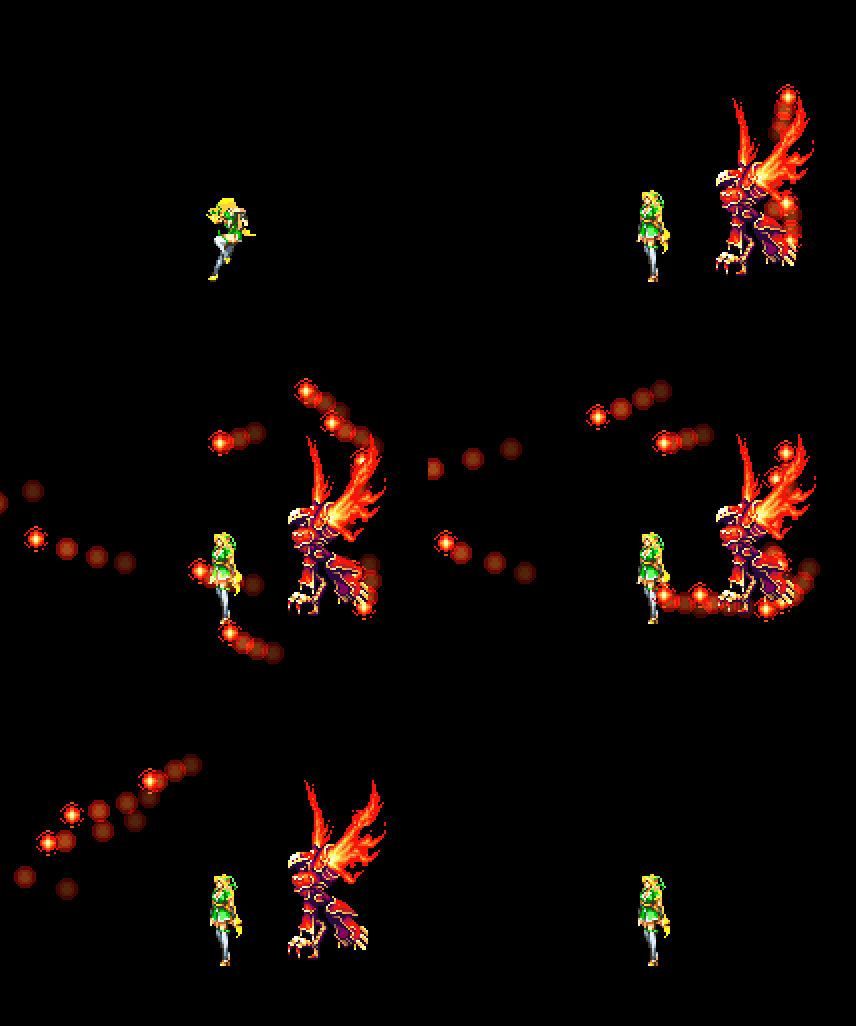
Summon Suzaku
| “ | Two light-hitting red birds fly upwards at an angle to attack foes. | „ |
The great bird Suzaku is summoned, picks up Maria and fires a shower of fireballs all over the screen in a similar way to Richter's Hydro Storm. In Symphony of the Night, an armored great bird appears behind Maria, firing 20 pairs of fireballs in arcs above and below her at enemies.
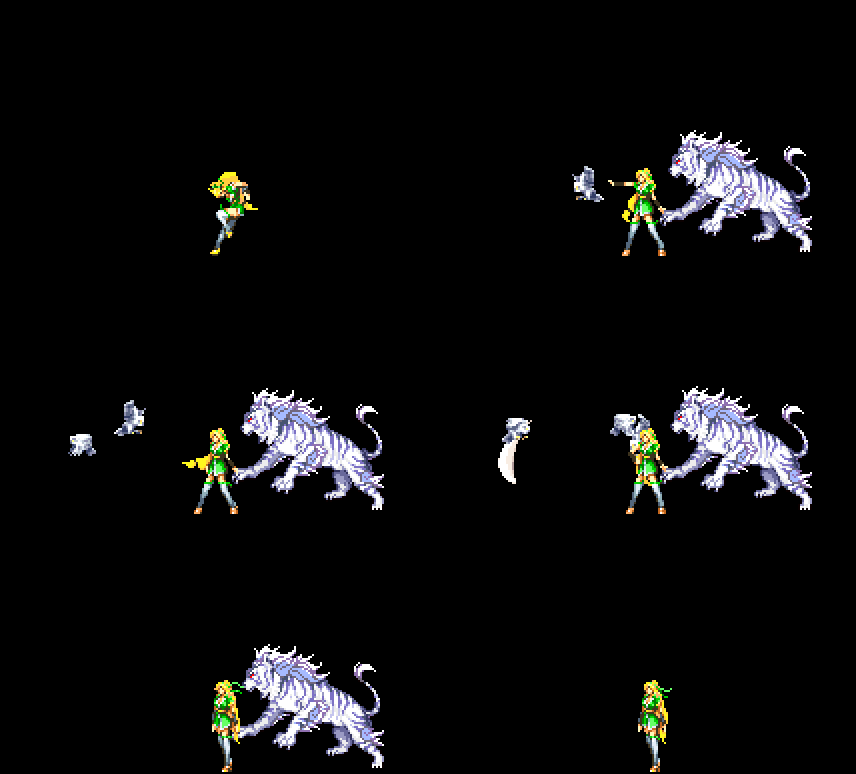
Summon Byakko
A white tiger appears to pick up Maria and runs over an enemy on his level, damaging it. In Symphony of the Night, a white tiger appears behind Maria for about 5 seconds. Every time she attacks with her owls while it's present, it will also swipe its claws in front of her, similar to the Vorpal Blade and Crissaegrim.
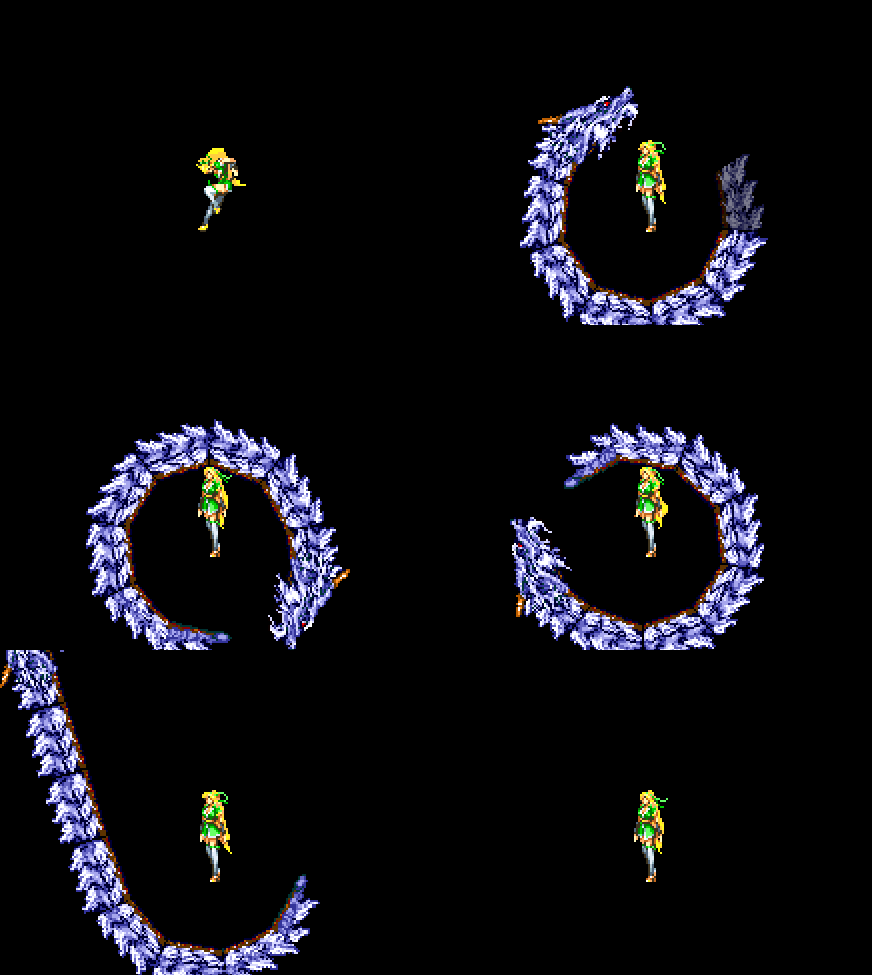
Summon Seriyuu
| “ | Sends a powerful dragon flying forward to attack enemies. | „ |
A big dragon covers about all the screen, dealing big damage to all enemies. However, its Heart cost is very high. In Symphony of the Night a big dragon circles around Maria and through enemies for 5 seconds before flying off the screen.
Summon Genbu
| “ | Covers the player in a turtle's shell, leaving them slow but invincible. | „ |
A big turtle will appear from the background, damaging all enemies on screen. In Symphony of the Night, a stone turtle appears in the middle of a large vortex for about 5 seconds. The vortex itself has a Soul Steal effect, with the turtle absorbing the life energy of enemies within it. After disappearing, the turtle's absorbed energy would transfer to Maria, healing her. Maria summons all of her animal friends to either herself or an ally, granting invulnerability and heightened power.
Guardian Knuckle
Maria summons a guardian who delivers a flurry of punches in front of her.
Songbook
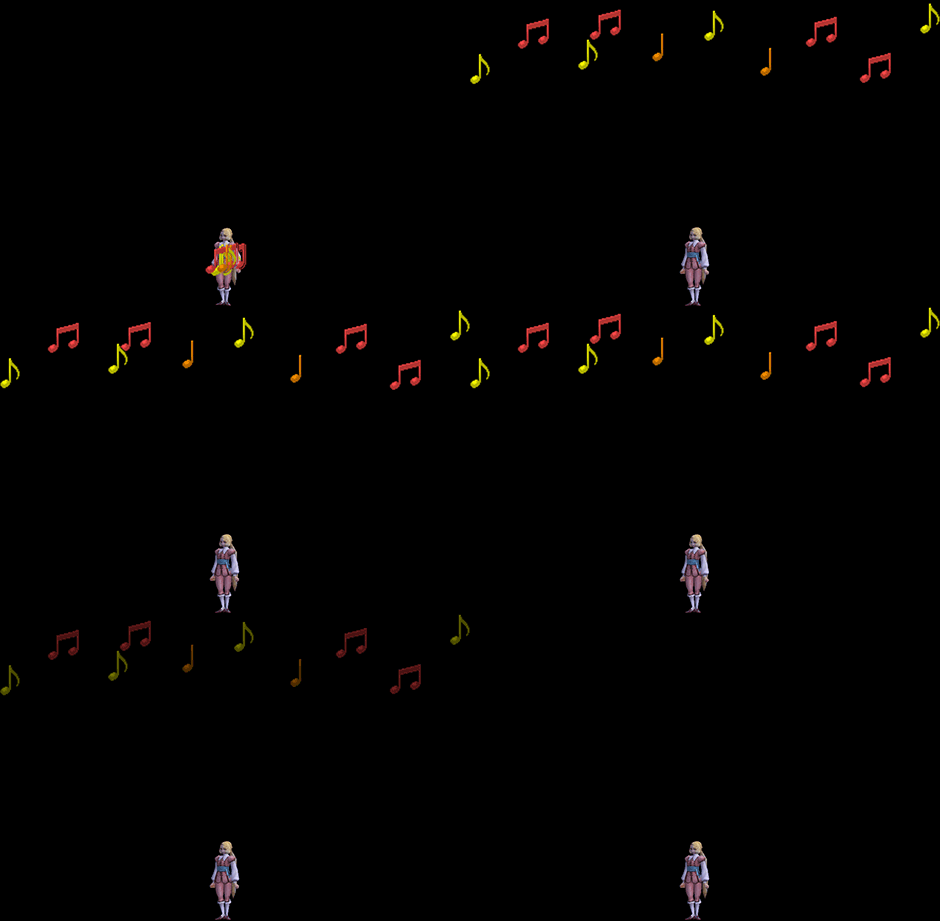
Twelve musical notes will appear all over the screen and stay there for several seconds, dealing continuous damage to enemies that touch them before disappearing.
Egg

Maria will drop an egg, which breaks open and a circle of birds emerges from it, with a red bird in the center of them. They will then fly off to one side of the screen, damaging all enemies in their path.
Key

Maria will hold the key up in the air, but it does nothing, however, any enemies that touch her will be harmed by contact damage.
Other
Standard Tactics: Maria will utilize her animal friends in combat, along with her own magic attacks and sub-weapons that best suit the situation.
Weaknesses: Maria has a weakness to the darkness element[253].
Note
- Contrary to popular belief, holy attacks and the whips in Castlevania can affect and harm people that aren't apart of the creatures of the night. Leon's doppelganger can use holy water and holy attacks against him in this fight along with the alchemy whip despite Leon being a pure and noble warrior[254]. Simon's doppelganger can harm him with the vampire killer, despite Simon being a noble hero. Holy Water even works and harms enemies such as the "Holy Armor"[255], a knight who has natural holy powers[256]. Corrupted enemies such as Charlie Vincent, use holy water attacks on Carrie and Reinhardt[257]. Characters like Jonathan Morris wear armor like the Holy Mail, an armor that reduces damage from holy attacks[258].
Trivia
- Maria's surname, renard, means "fox" in French.

(Universal Pictures, 1931)
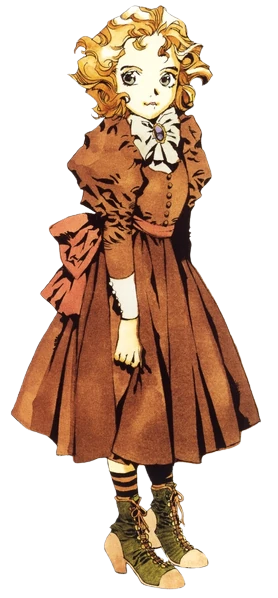
- Maria's original design in Castlevania: Rondo of Blood was possibly inspired by the minor character "Little Maria" (played by Marilyn Harris) from the 1931 horror film, Frankenstein. Maria is a little girl the creature befriends but who also accidentally kills. Maria Renard bears a striking resemblance to the film character: both are around the same age, have long hair styled in big curls, and wear a similar dress; and while the film is in black and white, it is believed Little Maria's dress was also pink (although apparently she had brown hair instead of blond). However, if Maria Renard is actually inspired by the film character is unconfirmed.
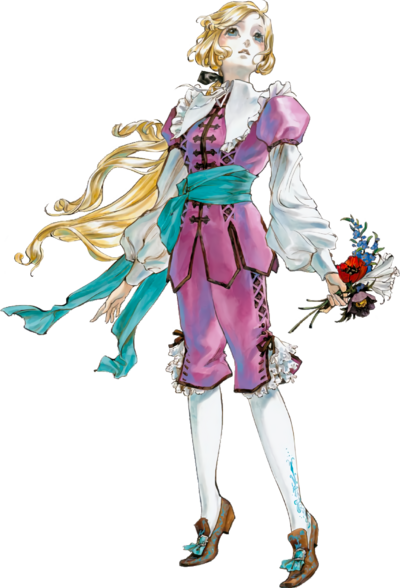
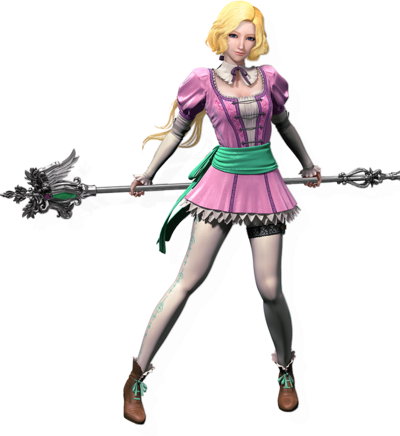
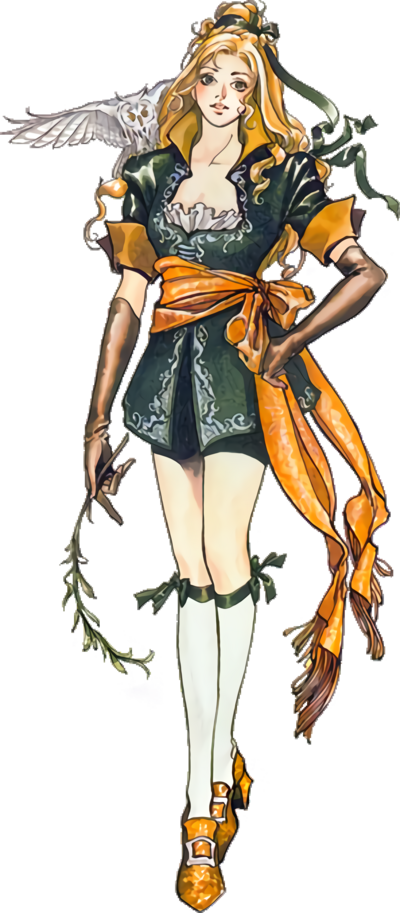
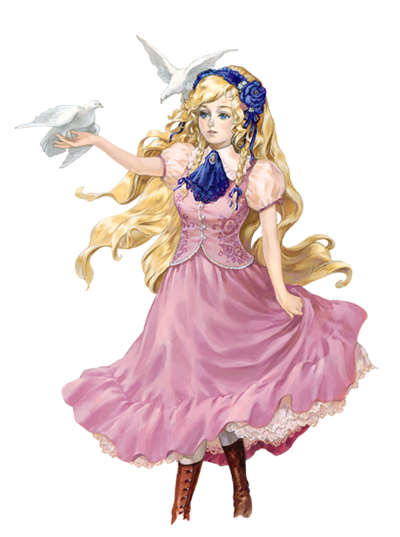
- Her alternate appearance in the Gekkan PC Engine magazine is apparently based on her sprite from Rondo of Blood. This design also appears on the Portrait of Ruin images and is used as the basis for her appearance in Harmony of Despair.
-
Maria from the Gekkan PC Engine strategy guide.
-
Maria from Portrait of Ruin.
-
Maria from Harmony of Despair.
- Her sprite in Dracula X is modified from her Rondo of Blood version with a different hairstyle. However, the dress color is different from the one in the instruction booklet.
- It seems Maria's sprite from the canceled game "Castlevania: The Bloodletting" may have been modified into Salome in Castlevania: Symphony of the Night.
-
Maria's sprite from the canceled game "Castlevania: The Bloodletting".
-
Salome's sprite from Symphony of the Night.
- In Symphony of the Night, Maria is referred as Richter Belmont's sister-in-law. After a newer version of the official timeline was released, it was stated that Maria is adopted by the Belmont family,[259] explaining how she became Richter's adopted sister. Maria herself is naturally a Belmont as games such as Grimoire of Soul and in Rondo of Blood, Dracula calls Maria "the blood of Belmont".
- Note that the Japanese term "義妹" (gimai) could refer to either "sister-in-law" and "adopted sister".
- Even though the US PlayStation version of Symphony of the Night profile indicates she had no relation to the Belmonts, the original Rondo of Blood instruction booklet does indicate she did have ties to them. This was reasserted in the North American instruction booklets of Castlevania: The Dracula X Chronicles[260] and Castlevania Judgment.[261]
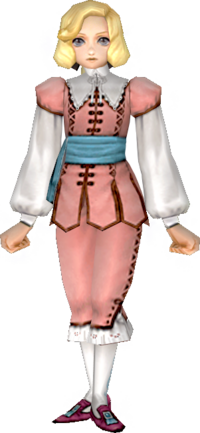
- In The Dracula X Chronicles, young Maria is wearing what looks like a boy's outfit, when other designs of her have always featured more feminine dresses or skirts.
- Maria was originally mentioned to be prepared for a sacrificial ritual in the instruction booklet for Rondo of Blood. In the remake, this was changed to Shaft unlocking her latent abilities in an attempt to get her to serve Dracula. This revision is also apparent in Maria's Judgment appearance.
- Maria's voice actress in The Dracula X Chronicles and its portable games, Michelle Ruff, also provided the voice of Shanoa in Castlevania: Order of Ecclesia.
- In Castlevania Judgment, Maria is said to have become orphaned since her parents were killed by Dracula[262]. This comes from the remake of Rondo of Blood, in which she says her parents were killed but never reveals by who or when.
- The Judgment version of Maria Renard was not well received by fans, mostly due to her abuse in comic relief, as well as her fixation on other female characters' anatomy, which made her appear hollow and unpleasant compared to her good nature and brave personality presented in the rest of her appearances.
- Both of Maria's English and Japanese voice actresses in Castlevania Judgment, Philece Sampler and Miyu Matsuki, respectively, have already passed away.
- The ending for the first Castlevania: Grimoire of Souls trailer features Maria singing with several cartoonish penguins (including Penta) dancing along, referring to the MSX game Penguin Adventure, where after beating the Freezaurus, they execute a similar dance.
- When Simon Belmont and Genya Arikado first meet the younger version of Maria, Genya mentions that Maria and he (as Alucard) once fought each other, referencing the Sega Saturn and The Dracula X Chronicles versions of Symphony of the Night, which featured an additional boss battle against Maria just before fighting Richter Belmont.
- Maria does not appear in the Beta version of Castlevania: Moonlight Rhapsody, other than in artwork.
- Carrie Fernandez in Castlevania (N64) and Castlevania: Legacy of Darkness has Maria's Rondo of Blood clothes as her alternate outfit.
- It is interesting that Carrie Fernandez has Maria's Rondo of Blood outfit as her alternate outfit as both of them share similarities. Both characters are 12 during their respective games, both are noted to possess mighty magical powers by an underling of Dracula, both dislike being treated as a kid, and both have had their parents killed by Dracula and mention their parents watching over them in heaven.
Battle Records
With Rondo of Blood
27-1-0
With The Dracula X Chronicles
29-1-0
Combined
56-1-0
- The Creature - Fight[275]
- Conditions: None.
- Location: Hidden Docks, Marble Gallery
- Shaft's Ghost - Fight[277]
- Conditions: Match was a rematch.
- Location: Clock Tower
- Carmilla & Laura - Fight[286]
- Conditions: None.
- Location: Stage 4: The Dungeon, Stage 4': Mountain Range
- The Creature - Fight[292]
- Conditions: None.
- Location: Stage 6: Marble Gallery
- Vampire Annette - Fight[294]
- Conditions: None.
- Location: Stage 7: Clock Tower
- Note: This is only accessible in the bad ending route, which is not in the main timeline.
- Shaft's Ghost - Fight[295]
- Conditions: Match was a rematch.
- Location: Stage 7: Clock Tower
- Golem - Fight[298]
- Conditions: None.
- Location: Time Rift
- Note: Fights against characters in the time rift are technically not the actual characters but one's desires being made within the time rift, such as why some characters like Dracula kill others in their story mode but the characters is alive and defeats Time Reaper in their own story mode, never meeting Dracula.
- Grant Danasty - Fight[299]
- Conditions: None.
- Location: Time Rift
- Note: Fights against characters in the time rift are technically not the actual characters but one's desires being made within the time rift, such as why some characters like Dracula kill others in their story mode but the characters is alive and defeats Time Reaper in their own story mode, never meeting Dracula.
- Shanoa - Fight[300]
- Conditions: None.
- Location: Time Rift
- Note: Fights against characters in the time rift are technically not the actual characters but one's desires being made within the time rift, such as why some characters like Dracula kill others in their story mode but the characters is alive and defeats Time Reaper in their own story mode, never meeting Dracula.
- Eric Lecarde - Fight[301]
- Conditions: None.
- Location: Time Rift
- Note: Fights against characters in the time rift are technically not the actual characters but one's desires being made within the time rift, such as why some characters like Dracula kill others in their story mode but the characters is alive and defeats Time Reaper in their own story mode, never meeting Dracula.
- Sypha Belnades - Fight[302]
- Conditions: None.
- Location: Time Rift
- Note: Fights against characters in the time rift are technically not the actual characters but one's desires being made within the time rift, such as why some characters like Dracula kill others in their story mode but the characters is alive and defeats Time Reaper in their own story mode, never meeting Dracula.
- Cornell - Fight[303]
- Conditions: None.
- Location: Time Rift
- Note: Fights against characters in the time rift are technically not the actual characters but one's desires being made within the time rift, such as why some characters like Dracula kill others in their story mode but the characters is alive and defeats Time Reaper in their own story mode, never meeting Dracula.
- Alucard - Fight[304]
- Conditions: None.
- Location: Time Rift
- Note: Fights against characters in the time rift are technically not the actual characters but one's desires being made within the time rift, such as why some characters like Dracula kill others in their story mode but the characters is alive and defeats Time Reaper in their own story mode, never meeting Dracula.
- Carmilla - Fight[305]
- Conditions: None.
- Location: Time Rift
- Note: Fights against characters in the time rift are technically not the actual characters but one's desires being made within the time rift, such as why some characters like Dracula kill others in their story mode but the characters is alive and defeats Time Reaper in their own story mode, never meeting Dracula.
- Time Reaper - Fight[307]
- Conditions: Match was a rematch.
- Location: Time Rift
None
References
- ↑ Castlevania: Symphony of the Night
- ↑ Castlevania: The Dracula X Chronicles Game Manual Page 4
- ↑ BradyGames Order of Ecclesia Official Strategy Guide p. 142.
- ↑ Castlevania: Nocturne of Recollection Intro
- ↑ Castlevania: Nocturne of Recollection Intro
- ↑ Castlevania Lament of Innocence
- ↑ BradyGames Order of Ecclesia Official Strategy Guide p. 143.
- ↑ Castlevania: The Dracula X Chronicles
- ↑ Castlevania: The Dracula X Chronicles
- ↑ Castlevania: Grimoire of Souls Chapter 3 Ash Banquet
- ↑ Castlevania: Lament of Innocence Ending
- ↑ Akumajou Densetsu Famicon Intro English Patch
- ↑ Castlevania: Curse of Darkness Manga Volume 1 Chapter 1
- ↑ Castlevania: The Dracula X Chronicles
- ↑ Castlevania Judgment Maria Renard True Story Mode, Maria vs. Eric Lecarde
- ↑ Castlevania: The Dracula X Chronicles Final Boss Maria Mode
- ↑ Castlevania: Aria of Sorrow Ending
- ↑ Castlevania: Dawn of Sorrow Dark Lord Candidates
- ↑ Castlevania: Dawn of Sorrow Ending
- ↑ Castlevania Judgment: True Story Mode, Golem
- ↑ Castlevania Judgment Golem Ultimate Attack
- ↑ Castlevnaia: Symphony of the Night
- ↑ Castlevania: The Dracula X Chronicles Alt Stage 4
- ↑ Castlevania: Grimoire of Souls Chapter 8: Demonic Visions
- ↑ Castlevania: Nocturne of Recollection Intro
- ↑ History of Castlevania - Crescent of the Moon Pages 40-41
- ↑ History of Castlevania - Crescent of the Moon Pages 40-41
- ↑ Akumajou Densetsu Famicon Intro English Patch
- ↑ Castlevania: Curse of Darkness Manga Volume 2 Chapter 4 "Redemption"
- ↑ Estimating Weight of Logs and Standing Timber Page 2
- ↑ Castlevania: Curse of Darkness
- ↑ Castlevania: Lament of Innocence Ending
- ↑ Castlevania: Harmony of Dissonance
- ↑ Castlevania: Aria of Sorrow Ending
- ↑ Castlevania: Dawn of Sorrow Dark Lord Candidates
- ↑ Castlevania: Dawn of Sorrow Ending
- ↑ Castlevania Aria of Sorrows
- ↑ Castlevania Grimoire of Souls Enemy Compendium Showcase
- ↑ Castlevania: Lament of Innocence Game Manual Page 10
- ↑ Lament of Innocence Perfect Guidebook
- ↑ Castlevania: Grimoire of Souls Maria Renard Description
- ↑ History of Castlevania - Crescent of the Moon Pages 40-41
- ↑ History of Castlevania - Crescent of the Moon Pages 40-41
- ↑ Akumajou Densetsu Famicon Intro English Patch
- ↑ Castlevania: The Dracula X Chronicles Intro
- ↑ Castlevania: Dracula X Final Boss
- ↑ Castlevania: Dawn of Sorrow Meeting Yoko & Julius
- ↑ Castlevania: Lament of Innocence Game Manual Page 10
- ↑ Castlevania: Grimoire of Souls Chapter 10 Dracula's Curse
- ↑ Castlevania: The Belmont's Legacy Issue 1
- ↑ Castlevania: Grimoire of Souls Chapter 10 Dracula's Curse
- ↑ Castlevania Judgment
- ↑ Castlevania: Lament of Innocence Game Manual Page 10
- ↑ Castlevania: Grimoire of Souls Chapter 6: Accursed Cranium
- ↑ Castlevania: Grimoire of Souls Chapter 8: Demonic Visions
- ↑ Castlevania: Legacy of Darkness Camilla Fernandez Boss Fight
- ↑ Castlevania: Curse of Darkness Trevor Boss Fight
- ↑ Castlevania: Harmony of Dissonance
- ↑ Castlevania: Lament of Innocence
- ↑ Castlevania: Lament of Innocence
- ↑ Haunted Castle Revisited Dominus Collection
- ↑ Castlevania III: Dracula's Curse
- ↑ Castlevania: The Adventure ReBirth
- ↑ Castlevania (N64)
- ↑ Castlevania: Lament of Innocence Final Boss
- ↑ Castlevania: The Arcade Death Boss Fight
- ↑ Castlevania Judgment Death True Story Mode
- ↑ Akumajo Dracula: Kabuchi no Tsuisoukyoku "““……Is there no way……Curtis can be saved.”
“What have you misunderstood? I am Death. Human death only comprises a part of chaos. They can come back again as zombies or skeletons, but without a soul, dead bodies cannot be revived. And ----- there is no reason to perform that.” - ↑ Akumajo Dracula: Kabuchi no Tsuisoukyoku "Those scythes constructed by magic did not turn towards Olrox or Michelle, every scythe then gathered near the youth’s body.
Then, those numerous blades made from magic overlapped with each other and with a powerful atrocious magic constructed a Death scythe in Death’s arm.
“This false castle……You shall fall into chaos as a thing that denies the existence of the [lord]……[death] shall pass judgment on your sins!”
Sensing the overwhelming existence of [death], Olrox again realized that the youth in front of him is [Death]------laughed out loud.
“interesting…… So, death really exists! Thus I’ll use all my power…… to shatter that thing called [death].” - ↑ Castlevania: Symphony of the Night Richter Mode Reverse Colosseum
- ↑ Castlevania: The Arcade White Dragon Boss
- ↑ Akumajo Dracula: Kabuchi no Tsuisoukyoku Novel “I had said it before. I do not intend to bind the world with chaos.”
“…… If so, why did you take power away from the crack in the eclipse’s seal? If you just intend to imitate like a monkey, isn’t your own power enough?”
Those were the emotionless words of Death.
In response, Olrox laughed his bold answer.
“As I’ve said, I would equally gain control over the human world and the source of Dracula’s power, chaos. I do not intend to obey someone else’s mind aside from my own. That includes you who were born out of chaos.”
“……”
“You should be glad though to know yourself. Just by stealing power, my shameful monotonous time is over…… Even before Alucard appeared, just because I showed up and declared war on him.”
Olrox’s voice was mixed with a tinge of thin delight. He respectfully bowed to Death who completely killed his emotions.
“I would end the reincarnation cycle of this demon castle. I who understood and was spun out of the stains of chaos, swear to rob that power with my hands. Now, yield.”
With Death’s reply, an explosive murderous intent rose.
Two bronze colored scythes much larger than usual appeared; it advanced to the space in between the two men with an intention to cut off Olrox’s head.
Kill the distance-----
Kill the sound-----
Just, faster, soon, die.
It can be seen that the blades have certainly caught Olrox’s neck, but----- that is only an after image and the vampire is already at Death’s back.
“……die.”
That was said by the enemy who called on his servants.
From the surrounding space, a group of purple bats rose, passed by Olrox’s arm with the speed of a bullet, attacking Death. However, Death did not show any gesture of avoiding them. He simply faced Olrox and sprayed out numerous scythes.
The bats and scythes cancelled each other out and the entire dance hall sparkled with blood." - ↑ Castlevania Judgment Death True Story Mode
- ↑ Castlevania: Rondo of Blood Death Boss
- ↑ Castlevania: Lament of Innocence Ending
- ↑ Castlevania Judgment Death True Story Mode Ending
- ↑ Castlevania: Harmony of Dissonance
- ↑ Castlevania: Curse of Darkness Bestiary No. 009
- ↑ Castlevania Judgment Tutorial
- ↑ Castlevania Judgment Simon Belmont Story Mode
- ↑ Castlevania: Lament of Innocence Dark Palace of Waterfalls
- ↑ Castlevania: Lament of Innocence
- ↑ Castlevania: Curse of Darkness Volume 2 Chapter 3
- ↑ Castlevania: The Belmont Legacy #2
- ↑ Castlevania: Harmony of Dissonance
- ↑ Castlevania: Harmony of Dissonance
- ↑ Castlevania: Symphony of the Night Bestiary No. 106
- ↑ Castlevania: Aria of Sorrow
- ↑ Castlevania: Aria of Sorrow
- ↑ Castlevania: Aria of Sorrow Julius Boss
- ↑ Castlevania Legends Game Manual Page 12
- ↑ Castlevania: The Belmont Legacy #1
- ↑ Castlevania: Lament of Innocence
- ↑ Castlevania: Lament of Innocence Page 10
- ↑ Castlevania: Aria of Sorrow
- ↑ Castlevania: Harmony of Dissonance Game Manual Page 22
- ↑ Castlevania: Lament of Innocent
- ↑ Castlevania: Harmony of Dissonance
- ↑ Castlevania: Curse of Darkness Trevor Second Boss Fight
- ↑ Castlevania: Curse of Darkness Infinite Corridor
- ↑ Castlevania: Lament of Innocence
- ↑ Castlevania: Lament of Innocence Garden Forgotten By Time
- ↑ Castlevania Judgment Simon Belmont Ultimate Attack
- ↑ Castlevania Judgment Trevor Belmont Ultimate Attack
- ↑ Castlevania: Lament of Innocence Game Manual Page 10
- ↑ Castlevania: Legends Game Manual Page 8
- ↑ Castlevania: Lament of Innocence
- ↑ Castlevania: Grimoire of Souls Crystal Drop, That Which Writhes Stage 1-5
- ↑ Castlevania Legends Game Manual Page 9
- ↑ Castlevania: Dawn of Sorrow
- ↑ Castlevania Chronicles
- ↑ Castlevania: Lament of Innocence
- ↑ Castlevania: Lament of Innocence
- ↑ Castlevania: The Dracula X Chronicles Stage 1
- ↑ Castlevania: Lament of Innocence
- ↑ Castlevania: Lament of Innocence Bestiary No. 031
- ↑ Castlevania: Lament of Innocence
- ↑ Castlevania: Lament of Innocence Bestiary No. 010
- ↑ Castlevania (N64)
- ↑ Castlevania: Lament of Innocence Bestiary No. 016
- ↑ Castlevania: Lament of Innocence Game Manual Page 10
- ↑ Castlevania: Lament of Innocence Game Manual Page 11
- ↑ Castlevania: Lament of Innocence
- ↑ Castlevania NES Final Boss
- ↑ Castlevania III: Dracual's Curse Final Boss
- ↑ Castlevania: Dracula X Final Boss
- ↑ Castlevania (N64) Final Boss
- ↑ Castlevania Adventure Rebirth Final Boss
- ↑ Castlevania: Bloodlines Final Boss
- ↑ Castlevania II: Simon's Quest
- ↑ Castlevania: Order of Shadows
- ↑ Super Castlevania IV
- ↑ Castlevania III: Dracula's Curse
- ↑ Castlevania Harmony of Despair
- ↑ Castlevania: Order of Shadows
- ↑ Castlevania Chronicles
- ↑ Castlevania: Lament of Innocence
- ↑ Castlevania: Order of Ecclesia
- ↑ Castlevania: Curse of Darkness Trevor Boss Fight
- ↑ Castlevania Judgment Aeon's Hyper Attack on Carmilla
- ↑ Castlevania Judgment Aeon's Hyper Attack on Golem
- ↑ Castlevania: Lament of Innocence
- ↑ Castlevania: Lament of Innocence Bestiary No. 030
- ↑ Castlevania II: Simon's Quest
- ↑ Castlevania II: Simon's Quest Game Manual Page 9
- ↑ Castlevania: Curse of Darkness Bestiary No. 112
- ↑ Castlevania: Lament of Innocence
- ↑ Castlevania: Lament of Innocence Bestiary No. 040
- ↑ Castlevania: Curse of Darkness Bestiary No. 065
- ↑ Castlevania Nocturne of Recollection
- ↑ Castlevania: Lament of Innocence
- ↑ Castlevania: Lament of Innocence Bestiary No. 076
- ↑ Castlevania: Lament Innocence
- ↑ Castlevania III: Dracula's Curse Death Boss
- ↑ Castlevania Death Boss
- ↑ Castlevania: Rondo of Blood Death Boss
- ↑ Castlevania: Harmony of Dissonance Death Boss
- ↑ Castlevania (N64) Death Boss
- ↑ Castlevania Judgment Aeon's Hyper Attack Sequences
- ↑ Castlevania Judgment Aeon's Hyper Attack on Death
- ↑ Akumajo Dracula: Kabuchi no Tsuisoukyoku Novel “I had said it before. I do not intend to bind the world with chaos.”
“…… If so, why did you take power away from the crack in the eclipse’s seal? If you just intend to imitate like a monkey, isn’t your own power enough?”
Those were the emotionless words of Death.
In response, Olrox laughed his bold answer.
“As I’ve said, I would equally gain control over the human world and the source of Dracula’s power, chaos. I do not intend to obey someone else’s mind aside from my own. That includes you who were born out of chaos.”
“……”
“You should be glad though to know yourself. Just by stealing power, my shameful monotonous time is over…… Even before Alucard appeared, just because I showed up and declared war on him.”
Olrox’s voice was mixed with a tinge of thin delight. He respectfully bowed to Death who completely killed his emotions.
“I would end the reincarnation cycle of this demon castle. I who understood and was spun out of the stains of chaos, swear to rob that power with my hands. Now, yield.”
With Death’s reply, an explosive murderous intent rose.
Two bronze colored scythes much larger than usual appeared; it advanced to the space in between the two men with an intention to cut off Olrox’s head.
Kill the distance-----
Kill the sound-----
Just, faster, soon, die.
It can be seen that the blades have certainly caught Olrox’s neck, but----- that is only an after image and the vampire is already at Death’s back.
“……die.”
That was said by the enemy who called on his servants.
From the surrounding space, a group of purple bats rose, passed by Olrox’s arm with the speed of a bullet, attacking Death. However, Death did not show any gesture of avoiding them. He simply faced Olrox and sprayed out numerous scythes.
The bats and scythes cancelled each other out and the entire dance hall sparkled with blood." - ↑ Castlevania (N64) Renon Boss
- ↑ Castlevania (N64) Carrie Fernandez Bad Ending
- ↑ Castlevania: Harmony of Dissonance
- ↑ Castlevania: Harmony of Dissonance
- ↑ Castlevania: Symphony of the Night Bestiary No. 40
- ↑ Castlevania: Symphony of the Night Bestiary No. 16
- ↑ Castlevania: Portrait of Ruin Bestiary No. 133
- ↑ Castlevania: Lament of Innocence
- ↑ Castlevania (N64)
- ↑ Castlevania: Portrait of Ruin
- ↑ Castlevania: Portrait of Ruin
- ↑ Castlevania: Harmony of Dissonance
- ↑ Castlevania: Circle of the Moon
- ↑ Castlevania: Circle of the Moon
- ↑ Castlevania: Order of Ecclesia Bestiary No. 061
- ↑ Castlevania: Portrait of Ruin Bestiary No. 131
- ↑ Castlevania: Symphony of the Night Bestiary No. 44
- ↑ Akumajo Dracula: Kabuchi no Tsuisoukyoku "From the time they stepped into the mountains, Curtis and Michelle felt malicious intent in the air.
Even though it is still far away, their bodies seemed to squeal [run away].
There was definitely no room for doubt. It is certain that the [castle] exists at the back of the mountains. The church’s greatest vampire hunter, Julius Belmont must be contacted. However, the conversation jumped into the matter of the disappearance of several village children." - ↑ Akumajo Dracula: Kabuchi no Tsuisoukyoku "A drawbridge suspended from the main gate is seemingly welcoming Michelle’s arrival.
And her body was telling her [do not go] as her leg muscles were petrified like stone." - ↑ Castlevania: Grimoire of Souls
- ↑ Castlevania (N64)
- ↑ Castlevania Chronicles
- ↑ Castlevania Chronicles
- ↑ Akumajo Dracula: Kabuchi no Tsuisoukyoku "“Uh……aa……Mi……chelle……”
That really is no doubt an obsession.
The youth had more than 28 holes penetrating his limbs and body. His heart is already starting to fail and he is desperately trying to say something amidst the darkness.
“Only…… protect…… you……-----“
When he said those words he must say, the man’s soul already left his body-----becoming one of the floating spirits that wander the halls of the castle.
However-----
Fate did not allow it.
For those people who are involved with the demon castle, even the loneliness of death seemed half hearted-----
The man’s soul is pierced by a small scythe that flew in from somewhere. That scythe did not exist physically. It was a diabolic blade created by some magic and possessed a strong soul." - ↑ Castlevania: Curse of Darkness Bestiary No. 115
- ↑ Castlevania: Grimoire of Souls Chapter 7 Death's Reign
- ↑ Castlevania: Grimoire of Souls Chapter 1 Dracula's Castle
- ↑ Castlevania: Grimoire of Souls Prologue Stage 4
- ↑ Castlevania: Grimoire of Souls Chapter 2 A City of Fog
- ↑ Castlevania: Grimoire of Soul Chapter 2 A City of Fog
- ↑ Castlevania: Grimoire of Souls Chapter 3 Ash Banquet
- ↑ Castlevania: Grimoire of Souls Chapter 2 A City of Fog
- ↑ Castlevania: Grimoire of Souls Chapter 3 Ash Banquet
- ↑ Castlevania: Grimoire of Souls Chapter 7 Death's Reign
- ↑ Castlevania: Portrait of Ruin
- ↑ Castlevania: Grimoire of Souls Chapter 10 Dracula's Curse
- ↑ Castlevania: Grimoire of Souls Chapter 7 Death's Reign
- ↑ Castlevania: Grimoire of Souls Chapter 6 Accursed Cranium
- ↑ Castlevania: Grimoire of Souls Chapter 7 Death's Reign
- ↑ Castlevania: Grimoire of Souls Chapter 2 A City of Fog
- ↑ Castlevania: Grimoire of Souls Chapter 3 Ash Banquet
- ↑ Castlevania: Portrait of Ruin
- ↑ Castlevania: Lament of Innocent
- ↑ Castlevania: Curse of Darkness Manga Volume 1 Chapter 1
- ↑ Castlevania: Legacy of Darkness Camilla Fernandez Boss Fight
- ↑ Konami of Europe's Camilla Fernandez profile
- ↑ Castlevania: Portrait of Ruin
- ↑ Castlevania: Grimoire of Souls Prologue Stage 1
- ↑ Castlevania: Symphony of the Night Maria mode
- ↑ Castlevania: Symphony of the Night Maria mode
- ↑ Castlevania: Symphony of the Night Maria mode
- ↑ Castlevania: Nocturne of Recollection Chapter 2: Omen
- ↑ Castlevania: Rondo of Blood
- ↑ Castlevania: Lament of Innocence Game Manual Page 10
- ↑ Castlevania: Nocturne of Recollection Chapter 6: Counterattack
- ↑ Castlevania: Symphony of the Night Maria mode
- ↑ Castlevania: The Dracula X Chronicles
- ↑ Castlevania: Symphony of the Night Maria mode
- ↑ Castlevania: Symphony of the Night Maria mode
- ↑ Castlevania: Symphony of the Night "Final Stage: Bloodlines"
- ↑ Castlevania: Symphony of the Night Maria mode
- ↑ Castlevania: Symphony of the Night "Final Stage: Bloodlines"
- ↑ Castlevania: The Dracula X Chronicles Game Manual Pages 12-13
- ↑ Castlevania: Rondo of Blood
- ↑ Castlevania: Symphony of the Night Maria mode
- ↑ Castlevania: The Dracula X Chronicles Game Manual Pages 12-13
- ↑ Castlevania: Rondo of Blood
- ↑ Castlevania: Rondo of Blood
- ↑ Castlevania: Rondo of Blood
- ↑ Castlevania: Rondo of Blood
- ↑ Castlevania: Rondo of Blood
- ↑ Castlevania: Rondo of Blood
- ↑ Castlevania: Rondo of Blood
- ↑ Castlevania: Rondo of Blood
- ↑ Castlevania: Rondo of Blood
- ↑ Castlevania: Symphony of the Night Maria mode
- ↑ Castlevania: Symphony of the Night Maria mode
- ↑ Castlevania: Symphony of the Night Maria mode
- ↑ Castlevania: The Dracula X Chronicles Game Manual Pages 12-13
- ↑ Castlevania: Rondo of Blood
- ↑ Castlevania: Rondo of Blood
- ↑ Castlevania Judgment Maria Moveset
- ↑ Castlevania: Symphony of the Night Bestiary No. 140
- ↑ Castlevania: The Dracula X Chronicles Game Manual Pages 12-13
- ↑ Castlevania: The Dracula X Chronicles Game Manual Pages 12-13
- ↑ Castlevania: The Dracula X Chronicles Game Manual Pages 12-13
- ↑ Castlevania: The Dracula X Chronicles Alt Stage 3
- ↑ Castlevania: Symphony of the Night Bestiary No. 2
- ↑ Castlevania: Lament of Innocence Bestiary No. 017
- ↑ Castlevania: Curse of Darkness Bestiary No. 8
- ↑ Castlevania: Portrait of Ruin Bestiary No. 29
- ↑ Castlevania: Symphony of the Night Bestiary No. 140
- ↑ Castlevania: Lament of Innocence Dark Palace Of Waterfalls
- ↑ Castlevania: Circle of the Moon
- ↑ Castlevania: Grimoire of Souls Enemy Compendium Holy Knight
- ↑ Castlevania (N64) Charlie Vincent Boss
- ↑ Castlevania: Portrait of Ruin Holy Mail Description
- ↑ Akumajō Dracula timeline at Konami.jp
- ↑ Page 04 of the North American instruction booklet for Castlevania: The Dracula X Chronicles
- ↑ 21 of the North American instruction booklet for Castlevania Judgment
- ↑ 21 of the North American instruction booklet for Castlevania Judgment
- ↑ Castlevania: Rondo of Blood
- ↑ Castlevania: Rondo of Blood
- ↑ Castlevania: Rondo of Blood
- ↑ Castlevania: Rondo of Blood
- ↑ Castlevania: Rondo of Blood
- ↑ Castlevania: Rondo of Blood
- ↑ Castlevania: Rondo of Blood
- ↑ Castlevania: Rondo of Blood
- ↑ Castlevania: Rondo of Blood
- ↑ Castlevania: Rondo of Blood Shaft Boss
- ↑ Castlevania: Rondo of Blood
- ↑ Castlevania: Rondo of Blood Shaft Boss
- ↑ Castlevania: Rondo of Blood Shaft Boss
- ↑ Castlevania: Rondo of Blood
- ↑ Castlevania: Rondo of Blood
- ↑ Castlevania: Rondo of Blood
- ↑ Castlevania: The Dracula X Chronicles
- ↑ Castlevania: The Dracula X Chronicles
- ↑ Castlevania: The Dracula X Chronicles
- ↑ Castlevania: The Dracula X Chronicles
- ↑ Castlevania: The Dracula X Chronicles
- ↑ Castlevania: The Dracula X Chronicles
- ↑ Castlevania: The Dracula X Chronicles
- ↑ Castlevania: The Dracula X Chronicles
- ↑ Castlevania: The Dracula X Chronicles
- ↑ Castlevania: The Dracula X Chronicles
- ↑ Castlevania: The Dracula X Chronicles
- ↑ Castlevania: The Dracula X Chronicles
- ↑ Castlevania: The Dracula X Chronicles
- ↑ Castlevania: The Dracula X Chronicles
- ↑ Castlevania: The Dracula X Chronicles
- ↑ Castlevania: The Dracula X Chronicles
- ↑ Castlevania: The Dracula X Chronicles
- ↑ Castlevania: The Dracula X Chronicles
- ↑ Castlevania Judgment Maria Story Mode
- ↑ Castlevania Judgment Maria Story Mode
- ↑ Castlevania Judgment Maria Story Mode
- ↑ Castlevania Judgment Maria Story Mode
- ↑ Castlevania Judgment Maria Story Mode
- ↑ Castlevania Judgment Maria Story Mode
- ↑ Castlevania Judgment Maria Story Mode
- ↑ Castlevania Judgment Maria Story Mode
- ↑ Castlevania Judgment Maria Story Mode
- ↑ Castlevania Judgment Maria Story Mode
- ↑ Castlevania Judgment Maria Story Mode
- ↑ Castlevania: Symphony of the Night

