
The official discord link if you wish to join the discord: https://discord.gg/j5RKwCvAFu
Support the wiki on our official Ko-Fi page or Patreon page!
Jonathan Morris
From The Codex

|
"Mature Content" |
| This character or verse has mature themes and concepts, thus those of young age are ill-advised to look through these. |


| “ | I may not have the whip's power, but I can still kick your ass! | „ |
| ~ Jonathan to Death |
| “ | I don't care! Being a family means being connected by heart. Ties of blood and soul are insignificant. When I learned why my father did what he did, I understood. You used a curse to manipulate your "dear daughters"! Now THAT'S sad! | „ |
| ~ Jonathan to Brauner |
Background
Jonathan Morris is a key character in the Castlevania series, known for his role as a vampire hunter and for being the son of John Morris, the protagonist of Castlevania: Bloodlines. Jonathan is introduced as one of the main protagonists in the 2006 Nintendo DS game Castlevania: Portrait of Ruin. In this game, he teams up with his childhood friend and witch, Charlotte Aulin, to stop the resurrection of Dracula and prevent the dark lord from wreaking havoc once again. Jonathan, bearing the legacy of his family’s long line of vampire hunters, wields the famed whip, the Vampire Killer, which is central to the series' iconic weaponry.
Jonathan’s personality is often depicted as strong-willed, courageous, and slightly brash, a reflection of his determination to carry on his family’s mission. While he can be impulsive, he shares a close bond with Charlotte, which develops as they face numerous trials together. His backstory and motivations are deeply tied to his father's legacy, with the shadow of Dracula’s curse looming over his life.
After his appearance in Portrait of Ruin, Jonathan also made appearances in crossover titles like Castlevania: Harmony of Despair and Castlevania: Grimoire of Souls, expanding his role within the Castlevania universe. Despite the challenges and battles he faces, Jonathan remains a strong and reliable figure in the fight against the supernatural forces that threaten humanity.
| This dropdown contains the synopsis of Jonathan Morris’s story. Read at your own risk as you may be spoiled otherwise! |
|---|
|
Jonathan Morris is a descendant of the Belmont clan of vampire hunters. Like his father, John Morris, Jonathan eventually wields the legendary Vampire Killer whip to stave off the minions of evil, although he does not start off with the whip's full power due to his not being of the main Belmont lineage. While Jonathan starts out using the legendary weapon as a normal whip, he will also be able to equip other kinds of weapons, including swords, axes, and great swords. As a child, Jonathan was raised alongside the Fernandez/Belnades descendant Charlotte Aulin. The two shared a strong, supposedly platonic friendship. In 1944, Morris and Aulin worked together to foil the destruction of mankind by the vampire artist Brauner and his twin vampire daughters, Stella and Loretta. Jonathan shows animosity toward his father for not teaching him how to unlock the full potential of the Vampire Killer. However, as the game progresses and he meets Wind, Jonathan begins to fully appreciate and respect his father. It is possible that Jonathan would be the one to pass the whip onto Julius Belmont and maybe play a part in the Demon Castle War (he would be 73). He or his son/daughter would have given the Vampire Killer to Julius Belmont in order to defeat Dracula. Jonathan, or rather, a memory of him from the Grimoire of Souls, was stored inside a Grimoire modeled after 1944 Transylvania. While fighting the Dullahan, the Grimoire version of Jonathan ended up nearly killed due to the Grimoire being remotely rewritten by another party which caused the Dullahan to become exponentially stronger, which also affected his partner Charlotte thanks largely to her ties to that era. A group composed of Genya Arikado (using his true identity of Alucard within the Grimoire), as well as simulacrum versions of Simon Belmont, Charlotte, a younger version of Maria Renard and Shanoa later rescued him before he could be killed and proceeded to vanquish the Dullahan and seal away its Vital Soul. He later joined the group, and also took the opportunity to vent to Simon his frustrations regarding the harsh life he and his father had to endure due to the Belmonts' disappearance, while acknowledging that Simon was in no way responsible for any of the difficulties. Jonathan also wished to train alongside Maria to not get idle, although Simon, overhearing this, enthusiastically agreed and had him be his training partner, much to Jonathan's horror (as Simon frequently underwent a very excessive training regiment, especially by the standards of the 1940s). |
Personality
- Initial Anger Towards His Father: Jonathan initially was angered whenever his father was at all mentioned due to believing him to abandon him for selfish reasons, he later learns that in actuality it was due to his father protecting him from using the true power of the Vampire Killer.
- Strong Confidence: Jonathan is confident that no matter the task he and Charlotte can always get through it[1], his optimism and confidence shocks even Charlotte. With Jonathan noting he likes to think positive.
General Information
Name: Jonathan Morris[2]
Origin: Castlevania: Portrait of Ruin
First Appearance: Castlevania: Portrait of Ruin
Latest Appearance: Castlevania: Grimoire of Souls
Company: Konami
Creator: Koji Igarashi
Actor
- Japanese Voice Actor: Takahiro Sakurai
- English Voice Actor: Liam O'Brien
Sexuality: Heterosexual
Pronouns: He/Him
Age: 18 (Listed as 18 years old in the game manual[4])
Birth Year: 1926 (As he is be 18 years during the events of Portrait of Ruin[5], which takes place in 1944)
Homeworld: Earth
Residence: Unknown
Story Role: Main Protagonist
Classification: Member of the Morris Clan
Species: Human
State of Being: Regular
Physiology: Humanoid Physiology
Occupation: Vampire Hunter
Affiliations: Quincy Morris (His grandfather), John Morris (His father), Charlotte Aulin (His Childhood Friend)
Height: Unknown
Weight: Unknown
- During his Time: Alive
- Modern Time: Deceased (As he existed back in the 1900s, he is naturally dead from old age)
Alignment: Neutral Good (Jonathan and Charlotte are a duo of vampire hunters protecting the world from evil creatures of the night even without Jonathan being able to use the Vampire Killer initially[7])
Protection Level: Global Protector (Leon started a legacy of the Belmont clan to hunting the night[8]. Fought and defeated Dracula, where in Castlevania III: Dracula's Curse, Dracula plans to take over all of Europe[9], proceeded to amass an army to kill hundreds of soldiers to take over Europe, plagued the beautiful land located in the Southern Part of Romania into darkness by having devils attack it, planned to spread his evil grip to the rest of Europe[10])
Codex Statistics
Key: Before Obtaining the True Vampire Killer | After Obtaining the True Vampire Killer
Key Information
- Before Obtaining the True Vampire Killer: This key covers Jonathan during the earlier states of his journey where he was unable to use the Vampire Killer[11].
- After Obtaining the True Vampire Killer: This key covers Jonathan during the later states of his journey after he unlocked the true power of the Vampire Killer.
Grade: S (Noted by Charlotte that the Morrises' skills in batle equal those of the Belmonts[12])
Tier: At least 7-C, Higher with Offensive Form, Far Higher with Sheer Will. 7-B with Volcano | At least 7-C, Higher with Offensive Form, Far Higher with Sheer Will. 7-B with Volcano
Cardinality: Finite
Dimensionality: 3-D
Attack Potency: At least Town level (Potency) (Noted by Death during early game that John Morris was stronger than Jonathan, however Jonathan could fight harm and defeat 1900s Death without the whip, where Alucard notes that Death is a force to be reckoned with, where not one other of Dracula's henchman being able to compare[13], Dracula also serves as the absolute evil, the opposite to God[14], where for God to be perfectly good, there must be a being of perfect darkness[15], being the entity opposite to God[16], with such power making him far superior to Golem from Castlevania Judgment, as he died to a random unknown hunter after his return from the time rift[17]. Golem with his ultimate can shoot out a mouth blast that vaporizes everything it touches as far as the eye can see getting these results[18]. Can harm and fight against enemies stronger than characters who can take hits from neutron bomb[19], that have a yield range of 1-10 kilotons of TNT), Higher with Offensive Form (A stance that emphasizes offense[20], allowing Jonathan to do far more damage then he normally does[21]), Far Higher with Sheer Will (Simon claims that the Belmonts and Morrises did not defeat Dracula because of the Vampire Killer, with the reason behind heroes' capacity to fight against evil lying not in their physical strength but the noble desire to drive away evil and usher in all that is good, the desire to protect the world for all of humanity, with the courage to fight to protect others being the true essence of a hero and a Belmont's strength, with this even applying for other heroes such as Shanoa, Maria, Charlotte, and even Arikado[22]. Alucard notes that having something to protect surpasses the limits of strength[23]). City level (Potency) with Volcano (With Volcano, summons an erupting volcano[24], which produces 24 megatons of thermal energy) | At least Town level (Potency) (Fought and defeated the Vampire Killer's memory of Richter Belmont[25]. Can fight and defeat 1900s Dracula along with 1900s Death, and then proceeded to defeat Dracula after he absorbed Death and all of his power[26],Dracula also serves as the absolute evil, the opposite to God[27], where for God to be perfectly good, there must be a being of perfect darkness[28], being the entity opposite to God[29], with such power making him far superior to Golem from Castlevania Judgement, as he died to a random unknown hunter after his return from the time rift[30]. Golem with his ultimate can shoot out a mouth blast that vaporizes everything it touches as far as the eye can see getting these results[31]), Higher with Offensive Form, Far Higher with Sheer Will. City level (Potency) with Volcano
Durability: At least Town level, Higher with Stone Wall (A defensive stationary stance passed down in the Morris family[32] that allows a Morris to take less or no damage from attacks that would normally damage them[33]) & Defensive Form (A stance that emphasizes defense[34], increasing Jonathan's defense against attacks[35]), Far Higher with Sheer Will | At least Town level, Higher with Stone Wall, Far Higher with Sheer Will
Striking Strength: At least Town Class (Potency), Higher with Stone Wall, Far Higher with Sheer Will | At least Town Class (Potency), Higher with Stone Wall, Far Higher with Sheer Will
Lifting Strength: At least Class 10 (The Belmonts are known as the most powerful and renowned vampire hunters within the world of Castlevania[36], during and before Trevor's time[37], the Belmont's were feared because of their immense power[38], which should make them superior to Hector's Battle-Type innocent devils who can move entire tree logs that are blocking roads out of the way[39] where logs can weigh around 15 to 5 tons[40] and Hector's battle-type innocent devils can lift open large iron doors that "no man could force open"[41]), Class K with Strength Glove (With Strength Glove, increases pushing power[42], making Jonathan and Charlotte capable of stopping a train moving at top speed which takes this much force[43]), Far Higher with Sheer Will | At least Class 10, Class K with Strength Glove, Far Higher with Sheer Will
Travel Speed: Superhuman regularly (Comparable to Leon Belmont, who was able to escape Walter's Castle while running from the top floor to the entrance, before the entire structure collapsed[44]). At most Faster Than Light through full Aura (Comparable to Juste Belmont where Juste travels so fast that a light projection of him is left behind, enveloping with a blue aura around him[45]), Far Higher with Sheer Will | Superhuman regularly. At most Faster Than Light through full Aura, Far Higher with Sheer Will
Attack Speed: At most Faster Than Light (Can tag 1900s Death, where Alucard notes that Death is a force to be reckoned with, where not one other of Dracula's henchman being able to compare[46], which should make him far superior to enemies like the Sky Fish, who moves so fast that it appears as a beam of light and is only slowed down when time is stopped[47] and the White Demon, who can move at the speed of light at short distances[48]) | At most Faster Than Light (Can tag 1900s Dracula, who serves as the absolute evil, the opposite to God[49], where for God to be perfectly good, there must be a being of perfect darkness[50], being the entity opposite to God[51], making him faster then enemies such as the Sky Fish who moves so fast that it appears as a beam of light and is only slowed down when time is stopped[52] and the White Demon, who can move at the speed of light at short distances[53]), Far Higher with Sheer Will
Reaction Speed: At most Faster Than Light | At most Faster Than Light, Far Higher with Sheer Will
Stamina: Superhuman (Traveled around the entirety of Dracula's Castle fighting a multitude of enemies along the way without tiring)
Range: Standard Melee, Extended Melee with Knives, Swords, Great Swords, Spears, Axes & Clubs, and Whips (The typical whip is around 90 centimeters), Tens of Meters with Subweapons
Intelligence: Genius Intelligence (Able to utilize sub-weapons that possess great attack and power which in Castlevania requires one to have a high intelligence to be able to do[54])
Knowledge: Grandmaster level (Can fight and defeat 1900s Dracula along with 1900s Death, and then proceeded to defeat Dracula after he absorbed Death and all of his power[55], where he was a genius tactician as Mathias, who they called "Cronqvist the Wise"[56]. Jonathan is able to wield various different weapons in combat[57]. Trevor was the one that left behind many of the fighting techniques the Belmonts use today with Richter noting that Trevor refined those fighting techniques that have been handed down through the Belmont line[58], making all of the Belmont & Morris line have fighting techniques refined by Trevor and greater)
Powers and Techniques
Is a member of the Belmont Bloodline, which gives him:
Superhuman Physical Characteristics (The Belmonts are known as the most powerful and renowned vampire hunters within the world of Castlevania[59]. During and before Trevor's time[60], the Belmont's were feared because of their immense power[61]), Acrobatics (Due to Belmonts superhuman nature, they possess very athletic and acrobatic bodies, examples include Richter easily flipping over Death's scythe attack while also jumping around and fighting Death while on a moving horse carriage[62]. Richter also showcases this with his boss fight in Dracula X where he must jump across platforms while also fighting against Dracula[63]. Julius showcasing extreme acrobatic leaps to reach the top of a castle drawbridge[64]), Genius Intelligence (Belmonts are trained and some of the best users of various sub-weapons, which in Castlevania requires one to have a high intelligence to be able to do[65]), Martial Arts (Trevor left behind all of his fighting techniques to each new Belmont clan member and Morris clan member[66]), Weapon Mastery (No matter the Belmont, they have all showcase a natural gift in using weapons, with Christopher showcasing the tools of his family's destiny are always the axe, dagger, cross, & stop watch[67]. Many of the famous Belmont weapons were left behind by Trevor[68], with him noting them to be the axe, dagger, cross, holy water, and stop watch[69]), Aquatic Breathing (Jonathan and Charlotte can fight underwater just fine without needing to go above ground for air[70]), Save and Load (Jonathan and Charlotte bathe under the holy light of a holy statue, allowing them to save their progress[71]), Sheer Will (The Belmonts are all ones with strong courage and willpower, where having a strong constitution dictates and influences how fast one can recover from status effects such as poison or curse[72]. Belmonts are pillars of strength, willing to keep fighting even when weakened greatly and having their existence slowly erased from history[73]. Simon claims that the Belmonts and Morrises did not defeat Dracula because of the Vampire Killer, with the reason behind heroes' capacity to fight against evil lying not in their physical strength but the noble desire to drive away evil and usher in all that is good, the desire to protect the world for all of humanity, with the courage to fight to protect others being the true essence of a hero and a Belmont's strength, with this even applying for other heroes such as Shanoa, Maria, Charlotte, and even Arikado[74]. The Belmonts will should be greater than even the likes of the Fernandez/Belnades Clan, including Camilla Fernandez, where its noted she had great spirit and struggled mightily against the curse before she became a vampire[75]), Aura (Belmonts release a glow of aura around them[76], that envelops their body[77]), Non-Standard Interaction (Metaphysical Interaction; Belmonts can interact with ghosts with their whips and sub-weapons[78]. Elemental Interaction; Belmonts can interact with enemies that are the mist itself with their whips and sub-weapons[79]. Belmonts can interact with creatures of the night made of sand[80]. Can interact with creatures of the night made of fire[81]. Can fully disperse and destroy water bubbles instead of the attack just going through it[82]. Blood Interaction; Can harm and kill enemies made of blood[83]. Abstract Interaction; Belmonts can interact with and kill Death[84], where Death is death, being the absolute presence, the awe, the religion, and the dark god[85]. He refers to death itself as him[86]. Noting that he is completely death and human death is only a part of Chaos[87]. Olrox when seeing Death fight serious notes that he senses the overwhelming existence of death and states that death really exists[88]), Nullification (Pain Immunity Nullification; The Belmonts can make the White Dragon visibly react to pain[89] and scream out in pain, where it is an immortal being immune to pain and suffering[90]. Abstract Nullification; The Belmonts can nullify and destroy the scythes from Death, who can use his scythes to kill abstractions such as distance and sound[91]. Death decides who lives and who dies[92]), Immortality Negation (Ageless & Life and Death Immunity; The Belmonts can render immortal skeleton death gods like Death, mortal, having him bleed from attacks, giving him mortality as shown when Death dies to his own scythe cutting off his head and having blood spurt out, something not possible as a skeleton[93]. The Belmonts can kill Death to the point that he requires Mathias to survive in order for him to rise from the dead[94]. Death is a being unconstrained by mortality[95]), Resurrection Bypassing (The Belmonts can kill zombies[96], who are corpses brought back to life from the power of hate[97]), Enhanced Senses (Belmonts such as Trevor could sense the power of a Belmont within Simon and also could tell he did not seem to grasp the fundamentals of combat in Judgment's time rift[98]), Extrasensory Perception (Belmonts can feel others being in an area, such as Simon Belmont being able to feel Trevor Belmont is in the time rift[99]. Leon could sense and feel that Joachim Armster was a vampire[100]. Leon could sense the rage from a Vampire Killer[101]. Trevor could sense a bad omen approaching[102]. Christopher Belmont felt a "chill" upon Dracula's return[103]. Belmonts such as Juste could sense Death's overwhelming power[104]. Belmonts such as Juste could sense the aura of the two different layers of the castles[105]. Belmonts can see beings like the Bitterfly, a mutated insect, visible only to magicians[106]. Julius could sense the dark powers within Soma Cruz[107]. Julius could sense Dracula's powers at work within Graham, though could tell from sensing Graham that he very likely was not Dracula[108]. Julius when fighting Soma could feel the evil spirit within Soma but also Soma's good spirit[109]. Belmonts have the ability to sense the presence of beings physical and spiritual that cannot be seen by ordinary humans[110]), Precognition (Premonitions; Belmonts can have future premonitions through their dreams, such as Christopher dreaming about Dracula stealing his son and turning him evil, far before he even had one[111]), Magic (Due to coming into contact with Rinaldo and gaining the whip, Rinaldo granted him a magic amulet[112]. where Leon gained magical energy that would naturally be passed down to all of his descendants[113]. Belmonts such as Julius naturally have magical powers due to this[114], along with Juste having magical powers deriving from the Fernandez (Belnades) family[115]), Principle Manipulation (Magic comes from alchemy, a field that experiments with the principles of God's creation of the world[116]), Afterimage Creation (Belmonts can envelop themselves in an aura of light that allows them to move so fast, their light projections cannot keep up[117]), Glyph Creation & Portal Creation (The Belmont blood acts as a key to[118] the infinite corridor[119]), Empowerment & Holy Manipulation (Belmonts can amplify weapons, Leon holding The Whip of Alchemy had it become more powerful then before, with Rinaldo stating that the whip fits Leon better then it fits him, despite him being the one to make the Whip of Alchemy[120]. Medusa even noted that it wasn't so powerful before believing the whip gained its complete form[121]. Belmonts can call upon the power of the light and use it to amplify their strength to be stronger and faster[122], this is also shown with Trevor Belmont's ultimate in Castlevania Judgment[123]. The Belmonts can use their stored energy (hearts) and transfer it into subweapons to make regular weapons as strong as they are along with magically enhancing them[124]), Invulnerability (Belmonts have an inborn self-defense ability known as "Burning Mode" which makes them invincible and raises their status to twice the normal level[125]), Statistics Boost (Belmonts get stronger from hearing of someone's grief, wanting to help them[126]), Reactive Power Level (As Dracula grows stronger each time he revives, the Belmonts have had to keep up, evolving to be powerful even without the strength of the Vampire Killer[127]), Sealing (Metaphysical Sealing; Belmonts can capture the spirits of enemies equal or greater to an area boss and use their abilities from their soul[128]), Nullification (Sealing Nullification; Belmonts such as Julius can completely destroy barriers, however depending on how strong the barrier is, they may have no more energy to fight[129])
The Castle Abilities Include:
Reality Warping (The Castle does not work on standard logic, where changing rooms can have one view a completely different background[183], such as room with a blue sky that is reflecting up and downwards and having the cloud srotate at a fast speed[184]), Transmutation (Beings that come near are subject to the castle's influence, such as a local barnyard owl which was mutated just from flying near it[185]), Possession (The castle possesses objects with its magic, such as a ouija table[186]), Sealing (Dracula's magic captured Aguni, a primitive god of fire[187]. The Castle has doors sealed off without solving puzzles[188]. This can extend to walls being sealed off where explosions will not affect it until the seal is gone[189]), Mind Manipulation (Everything that enters the castle is under the control by the power of Dracula's castle[190], the ghost of Eric Lecarde needed to cast a magic barrier to bind himself so he could be free from the control of the castle[191]. The Castle corrupts the minds of those who enter it, such as making Maxim Kischine feel strange ever since coming to it[192]. It also corrupted the mind of Hugh turning him against Nathan with Nathan noting he's being controlled by Dracula[193]. The castle increases one's dark desires, allowing Dracula to easily control them[194]. The magic of Dracula's power that empowers the owl enemy also spurs it to violence[195]), Madness Manipulation (The Castle warped Gergoth, a once-gentle beast and drove it mad[196]), Size Manipulation (Magically enlarged a toad through the use of demonic baptism[197]), Fear Manipulation (Even while far away, Curtis and Michelle felt malicious intent from the castle where their bodies seemed to squeal "run away"[198]. Michelle even being at the entrance to the castle had her body telling her to not go in and her leg muscles being petrified like stone[199]), Curse Manipulation (The Curse status that spirits inflict[200] comes from them absorbing the magic power around the castle. The Castle cursed a human to turn into a lizard man[201]), Life Manipulation (The castle can bring inanimate statues to life to attack[202]. Can cause the glass murals to come to life and attack[203]), Soul Manipulation (Those that die in the castle become one of the floating spirits that wander the halls of the castle for eternity[204]), Abstract Manipulation & Hell Manipulation (The castle can create a core of evil made from hatred, envy, anger and other dark emotions[205]), Text Manipulation & Plot Manipulation (The vital souls are noted to be apart of the Castle's power[206], where is noted by Lucy that the "vital soul" of a monster is the cause of the grimoire chaos[207] where creatures of the night's dark powers allowed them to rewrite the Grimoires to strengthen their dark powers greatly[208], along with their vital souls causing the grimoires contents to be overwritten changing history to things such as Jonathan Morris is now at a disadvantage in battle[209], or Charlotte fading from existence due to them messing with the history of the Grimoires[210], Maria starting to fade because Richter's history is being rewritten[211], where if the contents of the book change the creatures magic will keep growing and eventually overflow into reality, causing the grimoire to fall into chaos and even more monsters materializing into the real world[212]. The text alterations also make the monsters stronger[213]. With the real world and world of grimoires being considered the same or "equal"[214], compared to the like of Brauner's painting worlds that are quantum multi-layered spaces requiring understandings of theories such as "Curse Amplification"[215]. Death was going to use Dracula's magic to rewrite Dracula's defeat to Trevor making it where Dracula defeats Trevor Belmont instead where Dracula would go on living in the rewritten grimoire with each grimoire being its own world and the grimoires influence extends into reality[216]), Law Manipulation (The vital souls are noted to be apart of the Castle's power[217], which alter grimoires, which do not adhere to the laws of reality[218]), Power Modification (The vital souls are noted to be apart of the Castle's power[219], which the vital souls cause alterations of the Grimoire that can greatly limit the powers of those far stronger than them, such as Jonathan Morris' power being limited due to the alterations[220]. The Chaos of the Grimoire destabilized the magic of the others[221])
All previous powers and abilities to a greater extent, Superhuman Physical Characteristics, Anti-Type Weaponry (Can harm and kill anything related to vampires, even if they are a divine being[276]), Extrasensory Perception (The Vampire Killer can sense who is a vampire[277], even those who are half-vampire such as Alucard[278]), Magic (The Vampire Killer has been referred to as a magic whip[279]), Contact Damage (Just through enemies merely touching the Vampire Killer they will be damaged by its effects[280]), Non-Standard Interaction (Abstract Interaction; Can interact with and kill Death, the abstract concept of death. Metaphysical Interaction; The Vampire Killer can interact with the creaturEs of the night[281] which includes[282] ghosts[283]. This is also shown in Haunted Castle Revisited[284]. Noted by Simon Belmont that the Vampire Killer will cleave one's soul[285]. Elemental Interaction; The Vampire Killer can interact with creatures of the night made of sand[286]. Can interact with creatures of the night made of fire[287]. Can fully disperse and destroy water bubbles instead of the attack just going through it[288]. Blood Interaction; Can harm and kill enemies made of blood[289]), Nullification (Invulnerability Negation; The Vampire Killer can completely remove Walter's invulnerability[290] to where he was immune to all other[291] weapons prior other then the Vampire Killer[292]. Power Nullification; Julius sealed the Vampire Killer within Dracula's castle in order to rip away Dracula's soul and magic[293]. Energy Nullification; Should be comparable to other magical whips that have been used to negate Dracula's Demonic Megido[294]. The Vampire Killer can nullify energy projectiles through hitting them[295], even those from Dracula[296]. Can negate fire projectiles[297]. Electricity Nullification; Can completely disperse and nullify electricity attacks[298]. Seal & Forcefield Nullification; The Vampire Killer can easily break open barrier seals[299]. Transformation Nullification; Christopher with the Vampire Killer injured Dracula so bad to the point that he was unable to transform back into "human" form[300]. Abstract Nullification; The Vampire Killer can nullify and destroy the scythes from Death, who can use his scythes to kill abstractions such as distance and sound[301]. Pain Immunity Nullification; The Vampire Killer can make the White Dragon visibly react to pain[302] and scream out in pain, where it is an immortal being immune to pain and suffering[303]), Regeneration Negation (Holy; Christopher with the Vampire Killer injured Dracula to the point that his powers were greatly depleted and he was unable to do things like simply transform back into "human" form[304]. Juste with the Vampire Killer could permanently kill Dracula's Wraith to where he'll fade from the world for good who regenerated from the complete destruction of his body[305]), Immortality Negation (Ageless & Life and Death Immunity; The Vampire Killer can render immortal skeleton death gods like Death, mortal, having him bleed from attacks, giving him mortality as shown when Death dies to his own scythe cutting off his head and having blood spurt out, something not possible as a skeleton[306]. The Vampire Killer can kill Death to the point that he requires Mathias to survive in order for him to rise from the dead[307]. Death is a being unconstrained by mortality[308]. Immortal Metaphysical Aspect; Can harm and kill anything related to vampires, even if they are a divine being[309]), Resurrection Bypassing (The Vampire Killer can kill zombies[310], who are corpses brought back to life from the power of hate[311]), Purification (The Vampire Killer can purify people who was turned into a monster[312]. Christopher with the Vampire Killer purified his son of the evil effects of Dracula[313]), Fire Manipulation (Enemies fade into fire upon being struck with the Vampire Killer[314]. Enemies burst into flames when struck by the vampire killer, with the flames attaching to anything it's connected to, such as a spider having its webs burst into flames too[315]. The whip can have fire burst around the enemies even without them dying[316]. Causes even objects like coffins to burst into flames[317]. This is even shown in Lament of Innocence, once Leon has the vampire killer[318]. This is even shown in graphic novels such as Belmonts Legacy[319]), Explosion Manipulation (Trevor swinging the whip at the ground caused the ground to explode[320]), Memory Manipulation & Soul Manipulation (The Vampire Killer holds the souls of the many Belmonts who once wilded it[321], the Vampire Killer could also possibly hold the souls of Belmonts who have not even touched it yet, as it was originally planned to have it summon Julius from the future but they ultimately didn't go with the idea), Lifeforce Absorption (Even if the The Vampire Killer accepts one as its master, it still chips away at one's life force with every lash[322]. One must sacrifice their lifeforce in order to wield it[323]), Deconstruction (The Vampire Killer can reduce one to just a skeleton[324]), Light Manipulation (The Whip can create orbs of light to light up torches[325])
Resistance to Attack Reflection (The Vampire Killer can harm Dracula with attacks where Dracula's mere rib bone reflects all projectiles back[326]), Mimicry (Doppelganger is unable to mimic the vampire killer during[327] the time of Lament of Innocence[328])
Wields Maxim Kischine's Stellar Sword[329], which gives him: Penetration Damage (Physical Penetration & Bladed Penetration; The Stellar Swords blade moves so fast it appears as a streak of light[330]), Transformation (Shapeshifting; The Stellar Sword can transform into a giant shuriken to be used for throwing attacks[331])
Resistance to Penetration Damage (Bladed Penetration; With Battle Jacket, made from a special fiber resistant to slashing attack[365]), Holy Manipulation (With Holy Mail, armor that reduces damage from holy attacks[366])
Resistance to Magic (With Elvin Cape, a cape that provides special protection against magic[369])
Resistance to Curse Manipulation (With Charm Necklace, a necklace that resists curses[391])
Equipment
| Whip | Description | Stats | Found | Drop | |
|---|---|---|---|---|---|
| Flame Whip | A whip imbued with the power of flames. | ATK +65 | Dark Academy, 2 rooms right of second save room | ||
| Jet Black Whip | Jet black whip imbued with the power of darkness. | ATK +44 | Burnt Paradise, after boss room | ||
| Leather Whip | Made from leather. A weapon for a warrior with panache. | ATK +22 | City of Haze, top left corner of third building | ||
| Medusa Whip | A whip that can turn its targets to stone. | ATK +30 | Medusa Head | ||
| Nebula | A chain that binds and destroys evil. | ATK +37 | Entrance, 6 squares up from Behemoth save room | ||
| Rose Stem Whip | A thorned whip that requires great skill to use. | ATK +60 | Tower of Death, second 2x3 room from the top | Maneating Plant | |
| Steel Whip | A whip fashioned from steel. | ATK +35 | Sandy Grave, on statue's lap in first room of pyramid | ||
| Undead Killer | A holy whip that can kill even the undead. | ATK +70 | Complete quest "S Rank Hunter" | ||
| Vampire Killer | The legendary whip wielded by the Belmont family. | Start game with it | |||
| Vampire Killer (Unlocked) | The legendary whip wielded by the Belmont family. | Defeat Whip's Memory after curing the Sisters |
Knives
| Knives | Description | Stats | Found | Drop | |
|---|---|---|---|---|---|
| Baselard | A dagger with an I-shaped haft. | ATK +35 | Buy from Vincent's Shop after beating the City of Haze boss | ||
| Cinquedea | An elaborate dagger encrusted with jewels. | ATK +59 | Buy from Vincent's Shop after beating the second Tower of Death boss | ||
| Combat Knife | A knife designed for close-quarters combat. | ATK +24 | Buried Chamber, behind a breakable wall three squares right of the save room before Behemoth | ||
| Katar | A dagger from India. | ATK +48 | Buy from Vincent's Shop after beating the first Tower of Death boss | Skeleton Blaze | |
| Knife | A cheap pocket knife. | ATK +9 | Vincent's Shop |
Swords
| Sword | Description | Stats | Found | Drop | |
|---|---|---|---|---|---|
| Agni's Flame | The flaming blade of Agni, the god of fire. | ATK +40 | Flame Demon | ||
| Assassin Blade | A poisoned blade preferred by assassins. | ATK +52 | Complete quest "Poison vs. Poison" | ||
| Bakatwa | A simple, effective sword that is easy to wield. | ATK +68 | Burnt Paradise, top left, middle of 3x3 room | ||
| Cutlass | A short sword used by sailors. | ATK +21 | Zacchino | ||
| Damascus Sword | A superior sword that never loses its razor-sharp edge. | ATK +88 | Alastor | ||
| Gladius | A sword used in ancient Rome. | ATK +35, DEF +2 | Dragon Zombie, Hill Guard | ||
| Heaven's Sword | A demon-slaying sword once wielded by an angel. | ATK +35 | Flying Armor | ||
| Jagdplaute | A deadly, yet elegantly crafted sword. | ATK +75 | Ruler's Sword | ||
| Long Sword | A common long sword. | ATK +29 | City of Haze, second tall room after boss, top left | ||
| Milican's Sword | A sword that sometimes turns those it strikes to stone. | ATK +40 | City of Haze, top right 2x4 room, top left exit (need either morph) | ||
| Rahab's Frost | An icy blade made from the fang of the water-dragon Rahab. | ATK +40 | Razor Bat | ||
| Short Sword | A sword with a short blade. | ATK +16 | Entrance, under main hallway | ||
| Stellar Sword | The blade of the legendary swordsman Maxim Kischine. | ATK +70 | Complete quest "Almighty" |
Great Swords
| Sword | Description | Stats | Found | Drop | |
|---|---|---|---|---|---|
| Claymore | A large Scottish blade. | ATK +30 | City of Haze, Second building, top right of largest room | ||
| Dragon Slayer | A sword forged to slay dragons. | ATK +99, MND +10 | Ruler's Sword | ||
| Falchion | A Norman sword with a wide, crescent-shaped blade. | ATK +42 | Andras | ||
| Final Sword | A demon-slaying sword once wielded by an angel. | ATK +120 | Final Guard | ||
| Great Sword | A massive sword designed to smash through its targets. | ATK +55 | Great Armor | ||
| Holy Claymore | An enormous sword shaped like a cross. | ATK +100, INT +10 | Vincent's Shop | ||
| Royal Sword | A two-handed sword of kings. | ATK +84, STR +6, CON +6, INT +6 | Complete quest "A Rank Hunter" | ||
| Zweihander | A German two-handed sword. | ATK +69 | Dragon Zombie |
Spears
| Spear | Description | Stats | Found | Drop | |
|---|---|---|---|---|---|
| Alucard's Spear | A spear with ties to Alucard. Once used by Eric. | ATK +120 | Complete quest "The Spear of Legend" | ||
| Couse | A polearm fitted with a large, curved blade. | ATK +90 | Slogra | ||
| Halberd | A polearm ending in a wide axe blade. | ATK +50 | Tower of Death, Waterwheel | ||
| Lance | A spear used by cavalry knights. | ATK +60 | Buy from Vincent's Shop after beating the first Tower of Death boss | ||
| Long Spear | A spear with an especially long shaft. | ATK +80 | Armor Knight | ||
| Partisan | A polearm fitted with a broad blade. | ATK +40 | Great Stairway, in room after Keremet fight | ||
| Sarissa | A Macedonian long spear. | ATK +100 | Buy from Vincent's Shop after beating the second Tower of Death boss | ||
| Spear | A standard spear. | ATK +31 | Entrance, right outside the door to Behemoth's boss room | ||
| Trident | A three-pronged spear. | ATK +70 | Imp |
Axes and Clubs
| Axe | Description | Stats | Found | Drop | |
|---|---|---|---|---|---|
| Axe | A heavy single-edged axe | ATK +50 | City of Haze, in a 1x2 room between two 2x4 rooms on right side. | ||
| Battle Axe | A double-edged axe designed for combat. | ATK +60 | Buy from Vincent's Shop after beating the first Tower of Death boss | ||
| Bhuj | A heavy war axe. | ATK +80 | Armored Fleaman | ||
| Bullova | An axe with a crescent-shaped blade. | ATK +115 | Minotaur | ||
| Golden Axe | An axe, crafted from gold, with astounding destructive power. | ATK +130 | Buy from Vincent's Shop after beating the first Master's Keep boss | ||
| Great Axe | A huge war axe. It is exceptionally heavy. | ATK +90 | Burnt Paradise, top right, 3x3 room | ||
| Mace | A large metal club. | ATK +45 | City of Haze, one square above third transporter | ||
| Morning Star | A club with a vicious, star-shaped head. | ATK +70 | Skeleton Flail | ||
| Voulge | An axe with a hooked blade. | ATK +100 | Buy from Vincent's Shop after beating the second Tower of Death boss | Old Axe Armor |
Fist
| Weapon | Description | Stats | Found | Drop | |
|---|---|---|---|---|---|
| Bahg Nahk | A handheld weapon whose name means "tiger claw". | ATK +35 | Sandy Grave, right end of horizontal path from start | ||
| Brass Knuckles | A metal knuckle weapon that adds sting to your punches. | ATK +10 | Vincent's Shop | ||
| Bullet Punch | Enable the wearer to throw punches at the speed of sound. | ATK +18 | Complete quest "Supersonic Punch" | ||
| Cestus | Hard knuckle guards worn by ancient boxers. | ATK +22 | Buried Chamber, bottom right of the circular path | ||
| Illusion Fist | Throw punches faster than the eye can see. | ATK +20 | Complete Boss Rush 2 in under 5:00 | ||
| Kaiser Knuckles | Knuckles imbued with divine rage. | ATK +45 | Sandy Grave, first room in pyramid, top left (need Owl Morph) | ||
| Whip Knuckles | Enable the wearer to throw whip-snap punches. | ATK +40 | Great Stairway, 1 square right and 2 down from Nation of Fools transporter (next to a Mimic, double jump to reach) |
| Armor | Description | Stats | Found | Drop |
|---|---|---|---|---|
| Adrenaline Gear | Makes time appear slower when taking damage. | DEF +15 | Jack O'Bones | |
| Combat Fatigues | A standard-issue military uniform. | DEF +10 | Vincent's Shop | Ghoul |
| Casual Clothes | Clothes worn regularly. | DEF +1 | Start game with it | |
| Feather Gear | Magical lightweight clothes. Get knocked far back when hit. | DEF +32 | Vincent's Shop | |
| Hobo's Clothes | Ragged, worn clothes. Your mother would be ashamed. | DEF +2 | Zombie | |
| Houppelande | A roomy robe with large, hanging sleeves. | DEF +5 | City of Haze | |
| Kalasiris | A translucent robe worn by ancient Egyptian nobility. | DEF +20 | Eligiza | |
| Poncho | A simple piece of clothing; a blanket with a hole on top. | DEF +7 | Great Stairway | Wight |
| Ancient Armor | Any damage reduces HP by 10% of maximum HP. | Old Axe Armor | ||
| Battle Jacket | Made from a special fiber resistant to slashing attacks. | DEF +7 | Nation of Fools | |
| Berserker Mail | Armor that increases damage dealt out and received. | STR +30, CON -30, MND -30 | DoubleAxe Armor | |
| Biker's Jacket | A jacket with protective padding. | DEF +4, STR +2, CON +2 | Andras | |
| Copper Plate | A breastplate made of copper. | DEF +9 | Buried Chamber | Axe Armor |
| Gold Plate | A breastplate made of gold. | DEF +25 | Dark Academy, Buster Armor | |
| Healing Mail | Armor that heals HP as the wearer walks. | DEF +12 | City of Haze | |
| Heavy Armor | Cumbersome armor. High defense, but slows down the wearer. | DEF +55, STR +5, MND +40 | Heavy Armor | |
| Holy Mail | Armor that reduces damage from holy attacks. | DEF +25, MND +10 | Forgotten City | |
| Impervious Mail | Armor that completely blocks some attacks. | DEF +8 | Dead Crusader | |
| Iron Plate | A breastplate made of iron. | DEF +15 | Great Stairway | Great Armor |
| Justaucorps | Extravagantly decorated 17th century coat. | DEF +8, INT +2, MND +2 | Vincent's Shop | |
| Lorica | Armor with a muscular design. Worn by Roman officers. | DEF +32, STR +3, CON +3 | Sandy Grave | |
| Platinum Plate | A breastplate made of platinum. | DEF +45 | Iron Golem | |
| Samurai Plate | Traditional body armor worn by samurai warriors. | DEF +35, CON +10, MND +10 | Dead Warrior | |
| Scout Armor | Defense improves as more of the map is uncovered. | DEF +5 | Boss Rush Mode | |
| Silver Plate | A breastplate made of silver. | DEF +18 | Forest of Doom, Crossbow Armor | |
| Spiked Mail | Armor covered with sharp spikes. Wear with caution. | CON -20, MND -20 | Vincent's Shop | |
| Surcoat | A garment bearing a noble family crest. | DEF +18, INT +5, MND +5 | Ghoul King | |
| Tailcoat | Just an everyday coat. Stylish, but offers little protection. | DEF +3 | Vincent's Shop | |
| Tuxedo Coat | The finest of formalwear (in classic black, of course). | DEF +10, LCK +2 | City of Haze |
| Cloak | Description | Stats | Found | Drop |
|---|---|---|---|---|
| Assassin's Cape | A stealth cape favored by assassins. | DEF +5, STR +3 | 13th Street | |
| Blue Cape | A beautiful blue cape. | DEF +3, INT +3 | Tower of Death | |
| Cape | A sturdy cape. | DEF +13 | City of Haze | |
| Elvin Cape | A cape that provides special protection against magic. | DEF +4, MND +5 | Vincent's Shop | |
| Hero's Cape | A flashy velvet cape. | DEF +2 | Zacchino | |
| Holy Mantle | A long cape worn by high-ranking clergymen. | DEF +3, INT +3 | Vincent's Shop | |
| Invisible Cape | A cape that renders the wearer invisible. | Complete Boss Rush 1 in under 3:00 | ||
| Paludamentum | A Roman general's cloak. | DEF +5, INT +5 | Vincent's Shop |
| Head Gear | Description | Stats | Found | Drop |
|---|---|---|---|---|
| Attica Helmet | A helmet with a feathered crest. | DEF +7, STR +5 | Forgotten City | |
| Ballroom Masque | A mask worn by nobles at formal dance. | DEF +4, INT +1 | Ghost Dancer | |
| Bandana | A piece of cloth to protect the forehead. | DEF +3, STR +1, CON +1 | Buried Chamber | |
| Combat Beret | A standard-issue military beret. | DEF +2, STR +2, CON +2 | Tower of Death | |
| Eye for Decay | Enable the wearer to see breakable walls. | Peeping Eye | ||
| Fedora | A fashionable hat that just feels right with a whip. | DEF +4 | Fleaman | |
| Gambler Glasses | Enable the wearer to see enemy item drop percentage. | LCK +2 | Wind's Quests | |
| Glasses | Make you look older and wiser. | DEF +2 | Flying Skull | |
| Goggles | Protective eyewear that provides safety. | DEF +5 | Great Stairway | |
| Head Guard | Protects the head from impacts. | DEF +2 | Entrance | |
| Iron Helmet | A helmet made of iron. | DEF +5 | Hill Guard | |
| Monocle | A lens for one eye. A favorite among distinguished gentlemen. | DEF +2, INT +2, MND +2 | Great Stairway | Dogether |
| Porkpie Hat | A felt hat with a small brim. | DEF +5 | Ripper | |
| Royal Crown | A crown encrusted with precious jewels from all over the world. | DEF +2, INT +2, MND +2, LCK +2 | Ghoul King | |
| Shogun Helmet | A helmet worn by the tyrant shogun Nobunaga. | DEF +10, STR +3, INT -5 | 13th Street | |
| Silk Hat | The hat of a true aristocrat. | DEF +5, INT +4 | Nation of Fools, Vincent's Shop | |
| Skull Mask | A frightening mask patterned after a skull. | DEF +13, INT -3, MND -3, LCK -3 | Malachi | |
| Stone Mask | A creepy mask used in ancient rituals. | DEF +3, LCK +1 | Mummy | |
| Sunglasses | Stylish eyewear that protects the eyes from ultraviolet rays. | DEF +10 | Vincent's Shop | |
| Thick Glasses | A pair of glasses with very thick lenses. | DEF +1, INT +3 | City of Haze | |
| Traveler's Hat | A wide-brimmed hat perfect for the well-traveled man. | DEF +6, INT +3, MND +3 | Vincent's Shop | Witch |
| Uraeus | An Egyptian royal crown decorated with a golden cobra. | DEF +3, LCK +5 | Elgiza | |
| Viking Helmet | The distinct two-horned helmet worn by Viking warriors. | DEF +4, STR +3 | Tower of Death, Vincent's Shop |
| Leg Gear | Description | Stats | Found | Drop |
|---|---|---|---|---|
| Gold Leggings | Leggings made of gold. | DEF +7 | Burnt Paradise | |
| Hiking Boots | Heavy, thick-treaded boots. | DEF +2, CON +1 | Vincent's Shop | |
| Iron Leggings | Leggings made of steel. | DEF +5 | Great Stairway | |
| Mercury Boots | Boots that allow the wearer to move faster. | Dark Academy | ||
| Moonwalkers | Boots that enhance the ability to dash backwards. | City of Haze | ||
| Oxfords | Thick-soled leather shoes. | DEF +3 | Vincent's Shop | |
| Platinum Leggings | Leggings made of platinum. | DEF +9 | Iron Golem | |
| Royal Sandals | Sandals decorated with precious gems. | DEF +4, INT +3, MND +5 | Sandy Grave | |
| Samurai Leggings | Leggings worn by a samurai. | DEF +5, STR +3, CON +3 | 13th Street | Skeleton Blaze |
| Sandals | Comfy-looking sandals made of leather. | DEF +1 | City of Haze | |
| Slick Boots | Boots that enhance sliding ability. | Tower of Death | Skeleton Blaze | |
| Spiked Boots | Boots that deal extra damage when kicking. | Nation of Fools | ||
| Steel Greaves | Steel armor for the legs. | DEF +8 | 13th Street | |
| Winged Boots | Boots that enable you to run like the wind. | 13th Street | ||
| Wingtips | For the fashionably-dressed vampire hunter. | DEF +4, MND +3 | Vincent's Shop |
| Accessory | Description | Stats | Found | Drop |
|---|---|---|---|---|
| Astral Ring | Consume HP instead of MP when using magic. | Boss Rush Mode | ||
| Blessed Ankh | Increases the effectiveness of recovery items. | Amalaric Sniper | ||
| Blessed Ring | A ring that neutralizes curses. | Wind's Quests | ||
| Gold Ring | A ring that increases luck with money. | Gold Skeleton | ||
| Heart Brooch | Increases the likelihood of getting hearts. | DEF +1 | Dodo | |
| Hercules Ring | A ring that lets you ignore blows like a mighty god. | Minotaur | ||
| Immunity Ring | A ring that neutralizes poison attacks. | Wind's Quests | ||
| Magus Ring | A ring that boosts MP restoration speed. | Wind's Quests | ||
| Master Ring | A ring that increases the mastery received. | Vincent's Shop | ||
| Miser Ring | A ring that boosts attack damage according to current wealth. | Wind's Quests | ||
| Pearl Ring | A ring adorned with a pearl. | DEF +2 | Vincent's Shop | Lilith |
| Sage Ring | A ring that boosts MP restoration speed. | Wind's Quests | ||
| Shaman Ring | A ring that increases the experience you earn. | 13th Street | ||
| Skull Ring | A ring that curses the wearer. | STR +6, CON +6, INT +6, MND +6, LCK -13 | Lesser Demon | |
| Stella's Locket | A locket with a picture of the twins, along with... | Tower of Death | ||
| Studded Choker | A choker with metal studs for the rebel in you. | DEF +1 | Vincent's Shop | |
| Thief Ring | A ring that increases the chances of finding rare items. | Wind's Quests | ||
| Tough Ring | A ring that shortens recovery time after taking damage. | DEF +1 | Golem |
| Relic | Description | Found | |
|---|---|---|---|
| Acrobat Cube | Spring off partner's shoulders to jump again in midair. | City of Haze | |
| Book of Spirits | Display the names of enemies when you attack them. | Entrance | |
| Call Cube | Call partner with [A]. Press again to send partner away. | Entrance | |
| Change Cube | Switch main player character with [X]. | Entrance | |
| Critical Art | Use your weapon's critical move with [Right, Right + Y]. | Nation of Fools | |
| Griffon Wing | Jump higher with [Up + L]. | Forgotten City | |
| Lizard Tail | Slide into narrow spaces with [Down + B]. | Wind's Quests | |
| Martial Art | Perform a jumping knee kick with [Up, Left, Down, Right + Y]. | Wind's Quests | |
| Push Cube | While pushing an object, call your partner to help you push. | City of Haze | |
| Skill Cube | Call partner to use their skill or magic with [R]. | City of Haze | |
| Spinning Art | Perform a spinning evasion move with [Right, Down, Left, Right + Y]. | Wind's Quests | |
| Stone of Flight | Double-jump in midair. | Great Stairway | |
| Strength Glove | Increase pushing power. | Sandy Grave | |
| Wait Cube | Call partner with [Down + A] to have partner stand still on the spot. | Entrance | |
| Whip Skill 1 | After attacking with the whip, hold [Y] to let it drop. | Entrance | |
| Whip Skill 2 | While jumping use [Down + Y] to attack diagonally downward. | Wind's Quests |
Notable Techniques
| Skill | Effect | Found | Drop | MP |
|---|---|---|---|---|
| Aura Blast | A technique that converts mental energy into a shockwave. | Clock Tower | 40 MP | |
| Axe | A throwing axe that is especially effective against targets overhead. | Axe Armor | 22 MP | |
| Bible | A book containing words that exorcise evil. | Wind's Quests | 22 MP | |
| Boomerang | A throwing weapon that returns to the thrower in an arc. | Skelerang | 28 MP | |
| Bwaka Knife | A throwing knife used by the Bwaka people. | Sandy Grave | 22 MP | |
| Cream Pie | A throwing weapon aimed at an enemy's face for psychological damage. | City of Haze | 3 MP | |
| Cross | A holy cross that dispels evil. | Wind's Quests | 30 MP | |
| Crossbow | A ranged weapon that fires bolts. | Crossbow Armor | 24 MP | |
| Dart | Does extra damage if it hits the center of the target. | Vincent's Shop | 3 MP | |
| Defensive Form | A stance that emphasizes defense CON +8. | Final Guard | 25 MP | |
| Discus | A round disc with razor edges. | Vincent's Shop | 32 MP | |
| Grenade | Explodes 1 second after the pin is pulled, Fire attribute. | Nation of Fools | 28 MP | |
| Holy Water | Create an intense rain of holy water. | Dark Academy | 25 MP | |
| Javelin | A throwing spear that sticks into the ground. | Armor Knight | 25 MP | |
| Knee Strike | A jumping knee strike inspired by legendary martial artists. | Entrance | 20 MP | |
| Knife | A throwing knife used by hunters. | Entrance | 20 MP | |
| Kunai | A ninja's knife; it is also a deadly throwing weapon. | Vincent's Shop | 20 MP | |
| Kunimitsu | A short sword with a beautifully-crafted blade. | Vincent's Shop | 24 MP | |
| Offensive Form | A stance that emphasizes offense STR +8. | Buried Chamber | 25 MP | |
| Paper Airplane | Not terribly intimidating, but just might put someone's eye out. | City of Haze | 3 MP | |
| Rampage | Flying fists of fury. | Vincent's Shop | 20 MP | |
| Richocet Rock | A weapon that bounces back after hitting walls. | Lerajie | 22 MP | |
| Rocket Slash | Dash at the enemy and perform a lightning-quick slash. | Wind's Quests | 40 MP | |
| Shuriken | A throwing blade used by ninjas. | Vincent's Shop | 20 MP | |
| Steel Ball | A very heavy steel ball. | Sandy Grave | 30 MP | |
| Stonewall | A defensive, stationary stance passed down in the Morris family. | Forest of Doom | 24 MP | |
| Taunt | Draws enemy attention to you. | Tower of Death | 10 MP | |
| Wrecking Ball | Swing a steel ball with devastating destructive power. | Heavy Armor | 25 MP | |
| Yagyu Shuriken | A refined throwing blade used by the deadliest ninjas. | Vincent's Shop | 24 MP |
1,000 Blades

| “ | Attack with a hail of knives. | „ |
1,000 Blades (also known as Thousand Dagger or Thousand Edge) is a formidable technique that unleashes a rapid flurry of daggers, overwhelming enemies with their sheer speed and quantity.
Axe Bomber

| “ | A combination attack from both sides. | „ |
Axe Bomber is a Dual Crush from Castlevania: Portrait of Ruin. Jonathan and Charlotte move offscreen in opposite directions, then rush back toward each other, crossing paths as a surge of energy forms between their hands. The energy builds until it bursts, releasing a devastating attack.
Dark Gate

| “ | Open the gates of darkness. | „ |
Dark Gate is a Dual Crush from Castlevania: Portrait of Ruin. Upon activation, two massive demonic hands tear open a dimensional rift, revealing a monstrous entity within. Dark winds surge from the portal, inflicting damage on any enemies they touch.
Divine Storm

| “ | Create an intense rain of holy water. | „ |
Hydro Storm, also referred to as Hydro Typhoon or Divine Storm, is a powerful area attack that summons holy water to rain down across the entire screen. This attack is highly accurate, as the cascading water is nearly impossible to evade, and it typically lasts for an extended duration.
Grand Cruz

| “ | A secret technique of the Belmont family that releases holy energy. | „ |
Grand Cross, also known as Grand Cruz, Holy Cross, or Cross Crash, is a devastating ultimate attack that summons massive crosses to inflict significant Holy-based damage. This technique is commonly utilized by protagonists in the series who are either members of the Belmont lineage or specialize in Holy-based abilities.
Greatest Five

| “ | Summon four legendary warriors to join the battle. | „ |
Greatest Five is the most powerful Dual Crush in Castlevania: Portrait of Ruin. It can only be unlocked in a room after defeating the Doppelganger at the end of the Nest of Evil. This attack summons the spirits (or memories of the Vampire Killer) of five legendary Belmonts: Richter, Leon, Trevor, Juste, and Simon. Each Belmont appears and delivers a mighty whip strike when they appear onscreen. Once the animation ends, the total damage from each strike is combined into a single, devastating blow that deals massive Strike and Holy damage to all enemies. It costs 250 MP per use.
Holy Lightning

| “ | Summon lightning in the shape of a cross. | „ |
Thunder Cross (called Holy Lightning in the Western release of Castlevania: Portrait of Ruin) is a Dual Crush attack where a cross-shaped lightning bolt forms between the partners' hands. The lightning extends across the screen and slowly rotates, dealing multiple Thunder-based hits to all enemies in its path.
Meteor

| “ | A powerful spell that summons a meteor. | „ |
Meteor is a Dual Crush performed by Jonathan Morris and Charlotte Aulin in Castlevania: Portrait of Ruin. Both characters combine their powers to summon a massive meteor, which slowly crashes to the Earth, dealing heavy damage to all enemies within its impact zone.
Rush

| “ | A basic combination where both partners take turns attacking. | „ |
Rush is a Dual Crush featured in Castlevania: Portrait of Ruin. It is the first Dual Crush that the player can acquire, and it can be found in a room within the market area of the City of Haze, the first portrait available for exploration. This attack involves both Jonathan and Charlotte rapidly alternating between strikes using their current weapons, delivering a powerful combination of blows to a single enemy. The attack is capable of dealing considerable to heavy damage, making it useful in battles against tough foes. However, it leaves both characters exposed and vulnerable to any surviving enemies once the attack concludes, putting them at risk of being countered while still in the midst of executing the strike.
Volcano

| “ | Summon an erupting volcano. | „ |
Volcano is a Dual Crush attack featured in Castlevania: Portrait of Ruin. Upon activation, a massive erupting volcano appears on-screen, releasing flaming rocks that are launched in various arcs across the area. This fiery assault creates a wide range of damage, making the attack powerful, but its spread can be somewhat inaccurate, as the rocks do not always land precisely where intended. Despite this, the attack remains potent, especially when dealing with groups of enemies. The appearance of the volcano itself draws inspiration from the Gradius series, contributing to the dramatic and explosive visual style of the move.
| Skill | Points | Effect |
|---|---|---|
| Knife | 300 | Jonathan will toss three knives rather than the standard two. |
| Axe | 1000 | The now-deadlier arcing axe increases in size, bettering its range. |
| Cross | 2000 | The cross increases in size, bettering its vertical coverage by a bit. |
| Holy Water | 2000 | The vial's holy flame travels along the ground at a greater distance. |
| Bible | 2000 | The bible's size increases as does its attack speed for an all-around boost. |
| Javelin | 1500 | The javelin increases in size, bettering its overall attack range. |
| Ricochet Rock | 1000 | A second rebound stone is tossed at an angle adjacent the first. |
| Boomerang | 1500 | The boomerang's size and speed increase, upping its usefulness. |
| Bwaka Knife | 1500 | The bwake knife increases in size and is thrown at greater speeds. |
| Shuriken | 300 | The shuriken's size doubles, effectively doubling its coverage. |
| Yagyu Shuriken | 1000 | The shuriken's size doubles, effectively doubling its coverage. |
| Discus | 1500 | A second disc is thrown backwards and after stopping darts forward. |
| Kunimitsu | 1000 | Jonathan will toss four blades rather than the standard two. |
| Kunai | 500 | Rather than three, Jonathan releases a five-directional kunai attack. |
| Paper Airplane | 100 | Characters from the series Parodius can be seen riding the plane. |
| Cream Pie | 100 | Despite no visual change, it inflicts greater damage. |
| Crossbow | 500 | The arrow's now-deadlier explosion covers a larger area. |
| Dart | 200 | The dart's effect will be at all times maximized--always hitting a bull's-eye. |
| Grenade | 200 | The grenade's appearance changes to a more classic stick form. |
| Steel Ball | 1000 | The steel ball grows itself a nice set of spikes, inflicting greater pain. |
| Wrecking Ball | 1000 | The steel ball grows itself a nice set of spikes plus its range increases. |
Other
Standard Tactics: Jonathan utilizes various different weapons for attacks, sub-weapons, and dual crushes.
Weaknesses
- Unique Weaknesses: Overuse of the Vampire Killer will drain a Morris' lifeforce[413].
- Armor Weaknesses: The Berserker Mail increases damage dealt out and received[414]. The Heavy Armor provides high defense but slows down the wearer[415].
- Accessories Weaknesses: The Skull Ring curses the wearer[416].
Note
- Contrary to popular belief, holy attacks and the whips in Castlevania can affect and harm people that aren't apart of the creatures of the night. Leon's doppelganger can use holy water and holy attacks against him in this fight along with the alchemy whip despite Leon being a pure and noble warrior[417]. Simon's doppelganger can harm him with the vampire killer, despite Simon being a noble hero. Holy Water even works and harms enemies such as the "Holy Armor"[418], a knight who has natural holy powers[419]. Corrupted enemies such as Charlie Vincent, use holy water attacks on Carrie and Reinhardt[420]. Characters like Jonathan Morris wear armor like the Holy Mail, an armor that reduces damage from holy attacks[421].
Miscellaneous Feats
Trivia
- In Castlevania: Portrait of Ruin, if the player holds Up on the D-pad for long enough without moving or attacking while playing as Jonathan, he will strike a pose.
- If this is done in front of Vincent Dorin at the Entrance and without Charlotte around, the priest will think that Charlotte is dead, to which she will respond (presumably from offscreen).
- If this is done in front of Vincent at the Entrance with Charlotte around, the priest will remark that they look like a couple, to which Jonathan responds that Charlotte is like a kid sister to him, only for her to retort for him to stop treating her like a child.
- Jonathan, much like his father, John Morris, is depicted as being left-handed in most of his pieces of official artwork. However, because of the nature of 2D sprites, his dominant hand will switch to match the side he is currently facing.
- Nonetheless, there are occasional pieces of artwork that depict him as right-handed. This behavior can also be seen in the cinematic featured after a period of inactivity in Castlevania: Portrait of Ruin''s main menu (this can also be viewed by pressing the B button while on the main menu).
- Most members/descendants of the Belmont clan are depicted with swords, but only Jonathan and Reinhardt Schneider are seen actually using theirs.
- Even if Jonathan can also use two-handed weapons like Soma Cruz in Castlevania: Dawn of Sorrow, he wields them with one hand for the most part. There are noticeable exceptions, though (such as when he wields the Alucard Spear).
- Jonathan is the only playable character who is able to use a jump kick in Castlevania: Portrait of Ruin.
- Jonathan is the second American character to appear in the Castlevania series, the first being his father John.
- Charlotte Aulin, with whom Jonathan was raised alongside, is also suggested to be of American descent.
- Jonathan could have been named after Jonathan Harker, the main protagonist of the 1897 Gothic horror novel, Dracula, by Bram Stoker.
- His name is also likely a reference to his father's, John Morris.
- His name may even throw back to Jonathan Joestar from the manga/anime JoJo's Bizarre Adventure, who also fought the undead and their vampire master, Dio Brando. This is further referenced when the player keeps holding Up on the D-pad; after a while, Jonathan will strike a pose very similar to those from JoJo's Bizarre Adventure. Moreover, only he can wear the Stone Mask, which is a reference to the same series.
Battle Records
24 - 0 - 0
- Stella Lecarde - Fight[428]
- Conditions: None.
- Location: Tower of Death
- Loretta Lecarde & Stella Lecarde - Fight[431]
- Conditions: Match was a rematch for Stella.
- Location: Master's Keep
- Note: Charlotte uses Sanctuary in order to cure them of their vampirism, however the bad ending shows Jonathan and Charlotte can defeat the sisters if needed[432].
- The Creature - Fight[433]
- Conditions: None.
- Location: Dark Academy
- Whip's Memory - Fight[437]
- Conditions: None.
- Location: Master's Keep
None.
None.
References
- ↑ Castlevania: Portrait of Ruin Death Boss
- ↑ Castlevania: Portrait of Ruin Intro Scene
- ↑ Castlevania: Portrait of Ruin Game Manual Page 20
- ↑ Castlevania: Portrait of Ruin Game Manual Page 20
- ↑ Castlevania: Portrait of Ruin Game Manual Page 20
- ↑ Castlevania Lament of Innocence
- ↑ Castlevania: Portrait of Ruin Intro Scene
- ↑ Castlevania: Lament of Innocence Ending
- ↑ Akumajou Densetsu Famicon Intro English Patch
- ↑ Castlevania: Curse of Darkness Manga Volume 1 Chapter 1
- ↑ Castlevania: Portrait of Ruin Intro Scene
- ↑ Castlevania: Grimoire of Souls Chapter 2 A City of Fog
- ↑ Castlevania: Grimoire of Souls Chapter 9 Vessel for the Lord
- ↑ Castlevania: Aria of Sorrow Ending
- ↑ Castlevania: Dawn of Sorrow Dark Lord Candidates
- ↑ Castlevania: Dawn of Sorrow Ending
- ↑ Castlevania Judgment: True Story Mode, Golem
- ↑ Castlevania Judgment Golem Ultimate Attack
- ↑ Castlevnaia: Symphony of the Night
- ↑ Castlevania: Portrait of Ruin Offensive Form Description
- ↑ Castlevania: Portrait of Ruin
- ↑ Castlevania: Grimoire of Souls Chapter 8: Demonic Visions
- ↑ Castlevania: Nocturne of Recollection Intro
- ↑ Castlevania: Portrait of Ruin Dual Crush Volcano
- ↑ Castlevania: Portrait of Ruin Richter Belmont Boss Fight
- ↑ Castlevania: Portrait of Ruin Final Boss
- ↑ Castlevania: Aria of Sorrow Ending
- ↑ Castlevania: Dawn of Sorrow Dark Lord Candidates
- ↑ Castlevania: Dawn of Sorrow Ending
- ↑ Castlevania Judgement: True Story Mode, Golem
- ↑ Castlevania Judgment Golem Ultimate Attack
- ↑ Castlevania: Portrait of Ruin Stonewall Description
- ↑ Castlevania: Portrait of Ruin
- ↑ Castlevania: Portrait of Ruin Defensive Form Description
- ↑ Castlevania: Portrait of Ruin
- ↑ History of Castlevania - Crescent of the Moon Pages 40-41
- ↑ History of Castlevania - Crescent of the Moon Pages 40-41
- ↑ Akumajou Densetsu Famicon Intro English Patch
- ↑ Castlevania: Curse of Darkness Manga Volume 2 Chapter 4 "Redemption"
- ↑ Estimating Weight of Logs and Standing Timber Page 2
- ↑ Castlevania: Curse of Darkness
- ↑ Castlevania: Portrait of Ruin Strength Glove Description
- ↑ Castlevania: Portrait of Ruin
- ↑ Castlevania: Lament of Innocence Ending
- ↑ Castlevania: Harmony of Dissonance
- ↑ Castlevania: Grimoire of Souls Chapter 9 Vessel for the Lord
- ↑ Castlevania Aria of Sorrows
- ↑ Castlevania Grimoire of Souls Enemy Compendium Showcase
- ↑ Castlevania: Aria of Sorrow Ending
- ↑ Castlevania: Dawn of Sorrow Dark Lord Candidates
- ↑ Castlevania: Dawn of Sorrow Ending
- ↑ Castlevania Aria of Sorrows
- ↑ Castlevania Grimoire of Souls Enemy Compendium Showcase
- ↑ Castlevania: Lament of Innocence Game Manual Page 10
- ↑ Castlevania: Portrait of Ruin Final Boss
- ↑ Lament of Innocence Perfect Guidebook
- ↑ Castlevania: Grimoire of Souls Calm Before the Storm Stage 5
- ↑ Castlevania: Grimoire of Souls Chapter 10 Dracula's Curse
- ↑ History of Castlevania - Crescent of the Moon Pages 40-41
- ↑ History of Castlevania - Crescent of the Moon Pages 40-41
- ↑ Akumajou Densetsu Famicon Intro English Patch
- ↑ Castlevania: The Dracula X Chronicles Intro
- ↑ Castlevania: Dracula X Final Boss
- ↑ Castlevania: Dawn of Sorrow Meeting Yoko & Julius
- ↑ Castlevania: Lament of Innocence Game Manual Page 10
- ↑ Castlevania: Grimoire of Souls Chapter 10 Dracula's Curse
- ↑ Castlevania: The Belmont's Legacy Issue 1
- ↑ Castlevania: Grimoire of Souls Chapter 10 Dracula's Curse
- ↑ Castlevania Judgment
- ↑ Castlevania: Portrait of Ruin Dagon Boss
- ↑ Castlevania: Portrait of Ruin Saving
- ↑ Castlevania: Lament of Innocence Game Manual Page 10
- ↑ Castlevania: Grimoire of Souls Chapter 6: Accursed Cranium
- ↑ Castlevania: Grimoire of Souls Chapter 8: Demonic Visions
- ↑ Castlevania: Legacy of Darkness Camilla Fernandez Boss Fight
- ↑ Castlevania: Curse of Darkness Trevor Boss Fight
- ↑ Castlevania: Harmony of Dissonance
- ↑ Castlevania: Lament of Innocence
- ↑ Castlevania: Lament of Innocence
- ↑ Haunted Castle Revisited Dominus Collection
- ↑ Castlevania III: Dracula's Curse
- ↑ Castlevania: The Adventure ReBirth
- ↑ Castlevania (N64)
- ↑ Castlevania: Lament of Innocence Final Boss
- ↑ Castlevania: The Arcade Death Boss Fight
- ↑ Castlevania Judgment Death True Story Mode
- ↑ Akumajo Dracula: Kabuchi no Tsuisoukyoku "““……Is there no way……Curtis can be saved.”
“What have you misunderstood? I am Death. Human death only comprises a part of chaos. They can come back again as zombies or skeletons, but without a soul, dead bodies cannot be revived. And ----- there is no reason to perform that.” - ↑ Akumajo Dracula: Kabuchi no Tsuisoukyoku "Those scythes constructed by magic did not turn towards Olrox or Michelle, every scythe then gathered near the youth’s body.
Then, those numerous blades made from magic overlapped with each other and with a powerful atrocious magic constructed a Death scythe in Death’s arm.
“This false castle……You shall fall into chaos as a thing that denies the existence of the [lord]……[death] shall pass judgment on your sins!”
Sensing the overwhelming existence of [death], Olrox again realized that the youth in front of him is [Death]------laughed out loud.
“interesting…… So, death really exists! Thus I’ll use all my power…… to shatter that thing called [death].” - ↑ Castlevania: Symphony of the Night Richter Mode Reverse Colosseum
- ↑ Castlevania: The Arcade White Dragon Boss
- ↑ Akumajo Dracula: Kabuchi no Tsuisoukyoku Novel “I had said it before. I do not intend to bind the world with chaos.”
“…… If so, why did you take power away from the crack in the eclipse’s seal? If you just intend to imitate like a monkey, isn’t your own power enough?”
Those were the emotionless words of Death.
In response, Olrox laughed his bold answer.
“As I’ve said, I would equally gain control over the human world and the source of Dracula’s power, chaos. I do not intend to obey someone else’s mind aside from my own. That includes you who were born out of chaos.”
“……”
“You should be glad though to know yourself. Just by stealing power, my shameful monotonous time is over…… Even before Alucard appeared, just because I showed up and declared war on him.”
Olrox’s voice was mixed with a tinge of thin delight. He respectfully bowed to Death who completely killed his emotions.
“I would end the reincarnation cycle of this demon castle. I who understood and was spun out of the stains of chaos, swear to rob that power with my hands. Now, yield.”
With Death’s reply, an explosive murderous intent rose.
Two bronze colored scythes much larger than usual appeared; it advanced to the space in between the two men with an intention to cut off Olrox’s head.
Kill the distance-----
Kill the sound-----
Just, faster, soon, die.
It can be seen that the blades have certainly caught Olrox’s neck, but----- that is only an after image and the vampire is already at Death’s back.
“……die.”
That was said by the enemy who called on his servants.
From the surrounding space, a group of purple bats rose, passed by Olrox’s arm with the speed of a bullet, attacking Death. However, Death did not show any gesture of avoiding them. He simply faced Olrox and sprayed out numerous scythes.
The bats and scythes cancelled each other out and the entire dance hall sparkled with blood." - ↑ Castlevania Judgment Death True Story Mode
- ↑ Castlevania: Rondo of Blood Death Boss
- ↑ Castlevania: Lament of Innocence Ending
- ↑ Castlevania Judgment Death True Story Mode Ending
- ↑ Castlevania: Harmony of Dissonance
- ↑ Castlevania: Curse of Darkness Bestiary No. 009
- ↑ Castlevania Judgment Tutorial
- ↑ Castlevania Judgment Simon Belmont Story Mode
- ↑ Castlevania: Lament of Innocence Dark Palace of Waterfalls
- ↑ Castlevania: Lament of Innocence
- ↑ Castlevania: Curse of Darkness Volume 2 Chapter 3
- ↑ Castlevania: The Belmont Legacy #2
- ↑ Castlevania: Harmony of Dissonance
- ↑ Castlevania: Harmony of Dissonance
- ↑ Castlevania: Symphony of the Night Bestiary No. 106
- ↑ Castlevania: Aria of Sorrow
- ↑ Castlevania: Aria of Sorrow
- ↑ Castlevania: Aria of Sorrow Julius Boss
- ↑ Castlevania Legends Game Manual Page 12
- ↑ Castlevania: The Belmont Legacy #1
- ↑ Castlevania: Lament of Innocence
- ↑ Castlevania: Lament of Innocence Page 10
- ↑ Castlevania: Aria of Sorrow
- ↑ Castlevania: Harmony of Dissonance Game Manual Page 22
- ↑ Castlevania: Lament of Innocent
- ↑ Castlevania: Harmony of Dissonance
- ↑ Castlevania: Curse of Darkness Trevor Second Boss Fight
- ↑ Castlevania: Curse of Darkness Infinite Corridor
- ↑ Castlevania: Lament of Innocence
- ↑ Castlevania: Lament of Innocence Garden Forgotten By Time
- ↑ Castlevania Judgment Simon Belmont Ultimate Attack
- ↑ Castlevania Judgment Trevor Belmont Ultimate Attack
- ↑ Castlevania: Lament of Innocence Game Manual Page 10
- ↑ Castlevania: Legends Game Manual Page 8
- ↑ Castlevania: Lament of Innocence
- ↑ Castlevania: Grimoire of Souls Crystal Drop, That Which Writhes Stage 1-5
- ↑ Castlevania Legends Game Manual Page 9
- ↑ Castlevania: Dawn of Sorrow
- ↑ Castlevania Chronicles
- ↑ Castlevania: Lament of Innocence
- ↑ Castlevania: Lament of Innocence
- ↑ Castlevania: The Dracula X Chronicles Stage 1
- ↑ Castlevania: Lament of Innocence
- ↑ Castlevania: Lament of Innocence Bestiary No. 031
- ↑ Castlevania: Lament of Innocence
- ↑ Castlevania: Lament of Innocence Bestiary No. 010
- ↑ Castlevania (N64)
- ↑ Castlevania: Lament of Innocence Bestiary No. 016
- ↑ Castlevania: Lament of Innocence Game Manual Page 10
- ↑ Castlevania: Lament of Innocence Game Manual Page 11
- ↑ Castlevania: Lament of Innocence
- ↑ Castlevania NES Final Boss
- ↑ Castlevania III: Dracual's Curse Final Boss
- ↑ Castlevania: Dracula X Final Boss
- ↑ Castlevania (N64) Final Boss
- ↑ Castlevania Adventure Rebirth Final Boss
- ↑ Castlevania: Bloodlines Final Boss
- ↑ Castlevania II: Simon's Quest
- ↑ Castlevania: Order of Shadows
- ↑ Super Castlevania IV
- ↑ Castlevania III: Dracula's Curse
- ↑ Castlevania Harmony of Despair
- ↑ Castlevania: Order of Shadows
- ↑ Castlevania Chronicles
- ↑ Castlevania: Lament of Innocence
- ↑ Castlevania: Order of Ecclesia
- ↑ Castlevania: Curse of Darkness Trevor Boss Fight
- ↑ Castlevania Judgment Aeon's Hyper Attack on Carmilla
- ↑ Castlevania Judgment Aeon's Hyper Attack on Golem
- ↑ Castlevania: Lament of Innocence
- ↑ Castlevania: Lament of Innocence Bestiary No. 030
- ↑ Castlevania II: Simon's Quest
- ↑ Castlevania II: Simon's Quest Game Manual Page 9
- ↑ Castlevania: Curse of Darkness Bestiary No. 112
- ↑ Castlevania: Lament of Innocence
- ↑ Castlevania: Lament of Innocence Bestiary No. 040
- ↑ Castlevania: Curse of Darkness Bestiary No. 065
- ↑ Castlevania Nocturne of Recollection
- ↑ Castlevania: Lament of Innocence
- ↑ Castlevania: Lament of Innocence Bestiary No. 076
- ↑ Castlevania: Lament Innocence
- ↑ Castlevania III: Dracula's Curse Death Boss
- ↑ Castlevania Death Boss
- ↑ Castlevania: Rondo of Blood Death Boss
- ↑ Castlevania: Harmony of Dissonance Death Boss
- ↑ Castlevania (N64) Death Boss
- ↑ Castlevania Judgment Aeon's Hyper Attack Sequences
- ↑ Castlevania Judgment Aeon's Hyper Attack on Death
- ↑ Akumajo Dracula: Kabuchi no Tsuisoukyoku Novel “I had said it before. I do not intend to bind the world with chaos.”
“…… If so, why did you take power away from the crack in the eclipse’s seal? If you just intend to imitate like a monkey, isn’t your own power enough?”
Those were the emotionless words of Death.
In response, Olrox laughed his bold answer.
“As I’ve said, I would equally gain control over the human world and the source of Dracula’s power, chaos. I do not intend to obey someone else’s mind aside from my own. That includes you who were born out of chaos.”
“……”
“You should be glad though to know yourself. Just by stealing power, my shameful monotonous time is over…… Even before Alucard appeared, just because I showed up and declared war on him.”
Olrox’s voice was mixed with a tinge of thin delight. He respectfully bowed to Death who completely killed his emotions.
“I would end the reincarnation cycle of this demon castle. I who understood and was spun out of the stains of chaos, swear to rob that power with my hands. Now, yield.”
With Death’s reply, an explosive murderous intent rose.
Two bronze colored scythes much larger than usual appeared; it advanced to the space in between the two men with an intention to cut off Olrox’s head.
Kill the distance-----
Kill the sound-----
Just, faster, soon, die.
It can be seen that the blades have certainly caught Olrox’s neck, but----- that is only an after image and the vampire is already at Death’s back.
“……die.”
That was said by the enemy who called on his servants.
From the surrounding space, a group of purple bats rose, passed by Olrox’s arm with the speed of a bullet, attacking Death. However, Death did not show any gesture of avoiding them. He simply faced Olrox and sprayed out numerous scythes.
The bats and scythes cancelled each other out and the entire dance hall sparkled with blood." - ↑ Castlevania (N64) Renon Boss
- ↑ Castlevania (N64) Carrie Fernandez Bad Ending
- ↑ Castlevania: Harmony of Dissonance
- ↑ Castlevania: Harmony of Dissonance
- ↑ Castlevania: Symphony of the Night Bestiary No. 40
- ↑ Castlevania: Symphony of the Night Bestiary No. 16
- ↑ Castlevania: Portrait of Ruin Bestiary No. 133
- ↑ Castlevania: Lament of Innocence
- ↑ Castlevania (N64)
- ↑ Castlevania: Portrait of Ruin
- ↑ Castlevania: Portrait of Ruin
- ↑ Castlevania: Harmony of Dissonance
- ↑ Castlevania: Circle of the Moon
- ↑ Castlevania: Circle of the Moon
- ↑ Castlevania: Order of Ecclesia Bestiary No. 061
- ↑ Castlevania: Portrait of Ruin Bestiary No. 131
- ↑ Castlevania: Symphony of the Night Bestiary No. 44
- ↑ Akumajo Dracula: Kabuchi no Tsuisoukyoku "From the time they stepped into the mountains, Curtis and Michelle felt malicious intent in the air.
Even though it is still far away, their bodies seemed to squeal [run away].
There was definitely no room for doubt. It is certain that the [castle] exists at the back of the mountains. The church’s greatest vampire hunter, Julius Belmont must be contacted. However, the conversation jumped into the matter of the disappearance of several village children." - ↑ Akumajo Dracula: Kabuchi no Tsuisoukyoku "A drawbridge suspended from the main gate is seemingly welcoming Michelle’s arrival.
And her body was telling her [do not go] as her leg muscles were petrified like stone." - ↑ Castlevania: Grimoire of Souls
- ↑ Castlevania (N64)
- ↑ Castlevania Chronicles
- ↑ Castlevania Chronicles
- ↑ Akumajo Dracula: Kabuchi no Tsuisoukyoku "“Uh……aa……Mi……chelle……”
That really is no doubt an obsession.
The youth had more than 28 holes penetrating his limbs and body. His heart is already starting to fail and he is desperately trying to say something amidst the darkness.
“Only…… protect…… you……-----“
When he said those words he must say, the man’s soul already left his body-----becoming one of the floating spirits that wander the halls of the castle.
However-----
Fate did not allow it.
For those people who are involved with the demon castle, even the loneliness of death seemed half hearted-----
The man’s soul is pierced by a small scythe that flew in from somewhere. That scythe did not exist physically. It was a diabolic blade created by some magic and possessed a strong soul." - ↑ Castlevania: Curse of Darkness Bestiary No. 115
- ↑ Castlevania: Grimoire of Souls Chapter 7 Death's Reign
- ↑ Castlevania: Grimoire of Souls Chapter 1 Dracula's Castle
- ↑ Castlevania: Grimoire of Souls Prologue Stage 4
- ↑ Castlevania: Grimoire of Souls Chapter 2 A City of Fog
- ↑ Castlevania: Grimoire of Soul Chapter 2 A City of Fog
- ↑ Castlevania: Grimoire of Souls Chapter 3 Ash Banquet
- ↑ Castlevania: Grimoire of Souls Chapter 2 A City of Fog
- ↑ Castlevania: Grimoire of Souls Chapter 3 Ash Banquet
- ↑ Castlevania: Grimoire of Souls Chapter 7 Death's Reign
- ↑ Castlevania: Portrait of Ruin
- ↑ Castlevania: Grimoire of Souls Chapter 10 Dracula's Curse
- ↑ Castlevania: Grimoire of Souls Chapter 7 Death's Reign
- ↑ Castlevania: Grimoire of Souls Chapter 6 Accursed Cranium
- ↑ Castlevania: Grimoire of Souls Chapter 7 Death's Reign
- ↑ Castlevania: Grimoire of Souls Chapter 2 A City of Fog
- ↑ Castlevania: Grimoire of Souls Chapter 3 Ash Banquet
- ↑ Castlevania: Portrait of Ruin
- ↑ Castlevania: Lament of Innocent
- ↑ Castlevania: Curse of Darkness Manga Volume 1 Chapter 1
- ↑ Castlevania: Legacy of Darkness Camilla Fernandez Boss Fight
- ↑ Konami of Europe's Camilla Fernandez profile
- ↑ Castlevania: Portrait of Ruin
- ↑ Castlevania: Grimoire of Souls Prologue Stage 1
- ↑ Castlevania: Grimoire of Souls Jonathan Morris Description
- ↑ Castlevania: Portrait of Ruin
- ↑ Castlevania: Portrait of Ruin
- ↑ Castlevania: Grimoire of Souls Calm Before the Storm Stage 5
- ↑ Castlevania: Portrait of Ruin
- ↑ Castlevania: Portrait of Ruin
- ↑ Castlevania: Portrait of Ruin
- ↑ Castlevania: Portrait of Ruin
- ↑ Castlevania: Portrait of Ruin
- ↑ Castlevania: Portrait of Ruin
- ↑ Castlevania: Portrait of Ruin
- ↑ Castlevania: Portrait of Ruin
- ↑ Castlevania: Portrait of Ruin
- ↑ Castlevania: Portrait of Ruin
- ↑ Castlevania: Portrait of Ruin
- ↑ Castlevania: Portrait of Ruin
- ↑ Castlevania: Portrait of Ruin
- ↑ Castlevania: Portrait of Ruin
- ↑ Castlevania: Portrait of Ruin
- ↑ Castlevania: Portrait of Ruin
- ↑ Castlevania: Portrait of Ruin
- ↑ Castlevania: Portrait of Ruin
- ↑ Castlevania: Portrait of Ruin
- ↑ Castlevania: Portrait of Ruin
- ↑ Castlevania: Portrait of Ruin Offensive Form Description
- ↑ Castlevania: Portrait of Ruin
- ↑ Castlevania: Portrait of Ruin Defensive Form Description
- ↑ Castlevania: Portrait of Ruin
- ↑ Castlevania: Lament of Innocence Game Manual Page 10
- ↑ Castlevania: Portrait of Ruin Aura Blast Description
- ↑ Castlevania: Portrait of Ruin
- ↑ Castlevania: Portrait of Ruin Dual Crush Axe Bomber
- ↑ Castlevania: Portrait of Ruin Dual Crush Greatest Five
- ↑ Castlevania: Portrait of Ruin Dual Crush Meteor
- ↑ Castlevania: Portrait of Ruin Dual Crush 1,000 Blades
- ↑ Castlevania: Portrait of Ruin Dual Crush Holy Lightning
- ↑ Castlevania: Portrait of Ruin Dual Crush Volcano
- ↑ Castlevania: Portrait of Ruin Dual Crush Grand Cruz
- ↑ Castlevania: Portrait of Ruin Dual Crush Divine Storm
- ↑ Castlevania: Portrait of Ruin Dual Crush Dark Gate Description
- ↑ Castlevania: Lament of Innocence
- ↑ Castlevania: Lament of Innocence
- ↑ Castlevania: Lament of Innocence
- ↑ Castlevania: Lament of Innocence
- ↑ Castlevania: Lament of Innocence
- ↑ Akumajo Dracula: Kabuchi no Tsuisoukyoku "“Oh, it does not matter much. Here, here!”
Hammer sensed that the air between the two suddenly felt heavy so he laughed out while holding a weapon.
It was a whip that was soaked in blood in some places.
“I picked this up at the garden and I believe this is yours, right? Old man Julius also uses a whip. I came here just to deliver this to ya.”
Whoosh, receiving the thrown whip, Michelle noticed that it was the magical whip that serves as Curtis’ weapon.
“That’s great……! Curtis! With this your power-----“
In order to shake away the confusion she had a while ago, Michelle raised her voice, but-----
“Sorry, but…… with my current self, I could not handle it.”
“……? What are you talking about? Curtis……”
was he still confused, Michelle made him grip his whip.
Snap, some kind of popping sound rang and Michelle felt a light shock in her arm.
“Uh……!?”
What happened, she directed her eyes on the origin of the shock-----
A part of the whip’s handle had a rotten like disintegration-----
A part of Curtis’ hand was burned, and that skin immediately returned back to as before.
----- No way……
“Curtis……?”
“……I am currently weak at holy magic.”
“Eh……”" - ↑ Castlevania: Lament of Innocence Bestiary No. 72
- ↑ Castlevania: Lament of Innocence Final Boss
- ↑ Castlevania: Lament of Innocence
- ↑ Castlevania: Grimoire of Souls Chapter 1 Dracula's Castle (Simon Belmont Summon)
- ↑ Castlevania NES Game Manual Page 4
- ↑ Super Castlevania IV
- ↑ Castlevania NES
- ↑ Castlevania NES Game Manual Page 4
- ↑ Castlevania NES Game Manual Pages 7-9
- ↑ Haunted Castle Revisited Dominus Collection
- ↑ Castlvania: Judgement Simon Belmont Story Mode
- ↑ Haunted Castle Revisited Dominus Collection
- ↑ Castlevania III: Dracula's Curse
- ↑ Castlevania: The Adventure ReBirth
- ↑ Castlevania (N64)
- ↑ Castlevania: Lament of Innocence Pagoda of the Misty Moon
- ↑ Castlevania: Lament of Innocence Pagoda of the Misty Moon
- ↑ Castlevania: Lament of Innocence
- ↑ Castlevania: Aria of Sorrow
- ↑ Castlevania: The Arcade Dracula Boss
- ↑ Castlevania NES
- ↑ Castlevania NES
- ↑ Castlevania Chronicles
- ↑ Castlevania: The Adventure ReBirth
- ↑ Haunted Castle Revisited Dominus Collection
- ↑ Castlevania II: Belmont's Revenge Game Manual Page 4
- ↑ Akumajo Dracula: Kabuchi no Tsuisoukyoku Novel “I had said it before. I do not intend to bind the world with chaos.”
“…… If so, why did you take power away from the crack in the eclipse’s seal? If you just intend to imitate like a monkey, isn’t your own power enough?”
Those were the emotionless words of Death.
In response, Olrox laughed his bold answer.
“As I’ve said, I would equally gain control over the human world and the source of Dracula’s power, chaos. I do not intend to obey someone else’s mind aside from my own. That includes you who were born out of chaos.”
“……”
“You should be glad though to know yourself. Just by stealing power, my shameful monotonous time is over…… Even before Alucard appeared, just because I showed up and declared war on him.”
Olrox’s voice was mixed with a tinge of thin delight. He respectfully bowed to Death who completely killed his emotions.
“I would end the reincarnation cycle of this demon castle. I who understood and was spun out of the stains of chaos, swear to rob that power with my hands. Now, yield.”
With Death’s reply, an explosive murderous intent rose.
Two bronze colored scythes much larger than usual appeared; it advanced to the space in between the two men with an intention to cut off Olrox’s head.
Kill the distance-----
Kill the sound-----
Just, faster, soon, die.
It can be seen that the blades have certainly caught Olrox’s neck, but----- that is only an after image and the vampire is already at Death’s back.
“……die.”
That was said by the enemy who called on his servants.
From the surrounding space, a group of purple bats rose, passed by Olrox’s arm with the speed of a bullet, attacking Death. However, Death did not show any gesture of avoiding them. He simply faced Olrox and sprayed out numerous scythes.
The bats and scythes cancelled each other out and the entire dance hall sparkled with blood." - ↑ Castlevania: Symphony of the Night Richter Mode Reverse Colosseum
- ↑ Castlevania: The Arcade White Dragon Boss
- ↑ Castlevania II: Belmont's Revenge Game Manual Page 4
- ↑ Castlevania: Harmony of Dissonance Final Boss
- ↑ Castlevania: Rondo of Blood Death Boss
- ↑ Castlevania: Lament of Innocence Ending
- ↑ Castlevania Judgment Death True Story Mode Ending
- ↑ Castlevania: Lament of Innocence Final Boss
- ↑ Castlevania: Harmony of Dissonance
- ↑ Castlevania: Curse of Darkness Bestiary No. 009
- ↑ Castlevania III: Dracula's Curse
- ↑ Castlevania II: Belmont's Revenge Soleil Boss
- ↑ Haunted Castle Revisited Dominus Collection
- ↑ Super Castlevania IV
- ↑ Super Castlevania IV
- ↑ Super Castlevania IV
- ↑ Castlevania: Lament of Innocence
- ↑ Castlevania: The Belmonts Legacy #3
- ↑ Castlevania: Curse of Darkness
- ↑ Castlevania: Grimoire of Souls Chapter 3 Ash Banquet
- ↑ Castlevania: Grimoire of Souls Chapter 10 Whip's Memory 2
- ↑ Castlevania: Portrait of Ruin
- ↑ Haunted Castle Revisited Dominus Collection
- ↑ Castlevania: Lament of Innocence
- ↑ Castlevania II: Simon's Quest
- ↑ Castlevania: Lament of Innocence
- ↑ Castlevania: Lament of Innocence Bestiary No. 073
- ↑ Castlevania: Portrait of Ruin Stellar Sword Description
- ↑ Castlevania: Harmony of Dissonance Maxim Mode
- ↑ Castlevania: Harmony of Dissonance Maxim Mode
- ↑ Castlevania: Portrait of Ruin Cross Item Description
- ↑ Castlevania: Portrait of Ruin
- ↑ Castlevania: Portrait of Ruin
- ↑ Castlevania: Portrait of Ruin Bible Item Description
- ↑ Castlevania: Portrait of Ruin Dart Item Description
- ↑ Castlevania: Portrait of Ruin Grenade Item Description
- ↑ Castlevania: Portrait of Ruin Ricochet Rock Item Description
- ↑ Castlevania: Portrait of Ruin Medusa Whip Description
- ↑ Castlevania: Portrait of Ruin Rose Stem Whip Description
- ↑ Castlevania: Portrait of Ruin Undead Killer Description
- ↑ Castlevania: Portrait of Ruin Flame Whip Description
- ↑ Castlevania: Portrait of Ruin Jet Black Whip Description
- ↑ Castlevania: Portrait of Ruin Nebula Description
- ↑ Castlevania: Portrait of Ruin Heaven's Sword Description
- ↑ Castlevania: Portrait of Ruin Milican's Sword Description
- ↑ Castlevania: Portrait of Ruin Agni's Flame Description
- ↑ Castlevania: Portrait of Ruin Rahab's Frost Description
- ↑ Castlevania: Curse of Darkness Absolute Zero Ring Description
- ↑ Castlevania: Portrait of Ruin Assassin Blade Description
- ↑ Castlevania: Portrait of Ruin Dragon Slayer Description
- ↑ Castlevania: Portrait of Ruin Final Sword Description
- ↑ Castlevania: Portrait of Ruin Holy Claymore Description
- ↑ Castlevania: Portrait of Ruin Bullet Punch Description
- ↑ Castlevania: Portrait of Ruin Illusion Fist Description
- ↑ Castlevania: Portrait of Ruin Kaiser Knuckles Description
- ↑ Castlevania: Portrait of Ruin Healing Mail Description
- ↑ Castlevania: Portrait of Ruin Impervious Mail, Description
- ↑ Castlevania: Portrait of Ruin Ancient Armor Description
- ↑ Castlevania: Portrait of Ruin Berserker Mail Description
- ↑ Castlevania: Portrait of Ruin Scout Armor Description
- ↑ Castlevania: Portrait of Ruin Spiked Mail Description
- ↑ Castlevania: Portrait of Ruin Adrenaline Gear Description
- ↑ Castlevania: Portrait of Ruin Feather Gear Description
- ↑ Castlevania: Portrait of Ruin Battle Jacket Description
- ↑ Castlevania: Portrait of Ruin Holy Mail Description
- ↑ Castlevania: Portrait of Ruin Assassin's Cape Description
- ↑ Castlevania: Portrait of Ruin Invisible Cape Description
- ↑ Castlevania: Portrait of Ruin Elvin Cape Description
- ↑ Castlevania: Portrait of Ruin Eye for Decay Description
- ↑ Castlevania: Portrait of Ruin Gambler Glasses Description
- ↑ Castlevania: Portrait of Ruin Mercury Boots Description
- ↑ Castlevania: Portrait of Ruin Moonwalkers Description
- ↑ Castlevania: Portrait of Ruin Slick Boots Description
- ↑ Castlevania: Portrait of Ruin Spiked Boots Description
- ↑ Castlevania: Portrait of Ruin Winged Boots Description
- ↑ Castlevania: Portrait of Ruin Shaman Ring Description
- ↑ Castlevania: Portrait of Ruin Astral Ring Description
- ↑ Castlevania: Portrait of Ruin Engagement Ring Description
- ↑ Castlevania: Portrait of Ruin Blessed Ankh Description
- ↑ Castlevania: Portrait of Ruin Magus Ring Description
- ↑ Castlevania: Portrait of Ruin Sage Ring Description
- ↑ Castlevania: Portrait of Ruin Master Ring Description
- ↑ Castlevania: Portrait of Ruin Miser Ring Description
- ↑ Castlevania: Portrait of Ruin Hercules Ring Description
- ↑ Castlevania: Portrait of Ruin Blessed Ring Description
- ↑ Castlevania: Portrait of Ruin Immunity Ring Description
- ↑ Castlevania: Portrait of Ruin Gold Ring Description
- ↑ Castlevania: Portrait of Ruin Heart Brooch Description
- ↑ Castlevania: Portrait of Ruin Thief Ring Description
- ↑ Castlevania: Portrait of Ruin Charm Necklace Description
- ↑ Castlevania: Portrait of Ruin Acrobat Cube Description
- ↑ Castlevania: Portrait of Ruin Griffon Wing Description
- ↑ Castlevania: Portrait of Ruin Stone of Flight Description
- ↑ Castlevania: Portrait of Ruin Change Cube Description
- ↑ Castlevania: Portrait of Ruin Call Cube Description
- ↑ Castlevania: Portrait of Ruin Wait Cube Description
- ↑ Castlevania: Portrait of Ruin Skill Cube Description
- ↑ Castlevania: Portrait of Ruin Push Cube Description
- ↑ Castlevania: Portrait of Ruin Strength Glove Description
- ↑ Castlevania: Portrait of Ruin Book of Spirits Description
- ↑ Castlevania: Portrait of Ruin Critical Art Description
- ↑ Castlevania: Portrait of Ruin Anti-Venom Item Description
- ↑ Castlevania: Portrait of Ruin Uncurse Potion Item Description
- ↑ Castlevania: Portrait of Ruin Potion Item Description
- ↑ Castlevania: Portrait of Ruin High Potion Item Description
- ↑ Castlevania: Portrait of Ruin Super Potion Item Description
- ↑ Castlevania: Portrait of Ruin Food Items
- ↑ Castlevania: Portrait of Ruin Tonic Item Description
- ↑ Castlevania: Portrait of Ruin High Tonic Item Description
- ↑ Castlevania: Portrait of Ruin Super Tonic Item Description
- ↑ Castlevania: Portrait of Ruin Magical Ticket Item Description
- ↑ Castlevania: Portrait of Ruin
- ↑ Castlevania: Portrait of Ruin Berserker Mail Description
- ↑ Castlevania: Portrait of Ruin Heavy Armor Description
- ↑ Castlevania: Portrait of Ruin Skull Ring Description
- ↑ Castlevania: Lament of Innocence Dark Palace Of Waterfalls
- ↑ Castlevania: Circle of the Moon
- ↑ Castlevania: Grimoire of Souls Enemy Compendium Holy Knight
- ↑ Castlevania (N64) Charlie Vincent Boss
- ↑ Castlevania: Portrait of Ruin Holy Mail Description
- ↑ Castlevania: Portrait of Ruin
- ↑ Castlevania: Portrait of Ruin
- ↑ Castlevania: Portrait of Ruin
- ↑ Castlevania: Portrait of Ruin
- ↑ Castlevania: Portrait of Ruin
- ↑ Castlevania: Portrait of Ruin
- ↑ Castlevania: Portrait of Ruin
- ↑ Castlevania: Portrait of Ruin
- ↑ Castlevania: Portrait of Ruin
- ↑ Castlevania: Portrait of Ruin
- ↑ Castlevania: Portrait of Ruin
- ↑ Castlevania: Portrait of Ruin
- ↑ Castlevania: Portrait of Ruin
- ↑ Castlevania: Portrait of Ruin
- ↑ Castlevania: Portrait of Ruin
- ↑ Castlevania: Portrait of Ruin
- ↑ Castlevania: Portrait of Ruin
- ↑ Castlevania: Portrait of Ruin
- ↑ Castlevania: Portrait of Ruin
- ↑ Castlevania: Portrait of Ruin
- ↑ Castlevania: Portrait of Ruin
- ↑ Castlevania: Portrait of Ruin
- ↑ Castlevania: Portrait of Ruin
- ↑ Castlevania: Portrait of Ruin
- ↑ Castlevania: Portrait of Ruin
- ↑ Castlevania: Portrait of Ruin
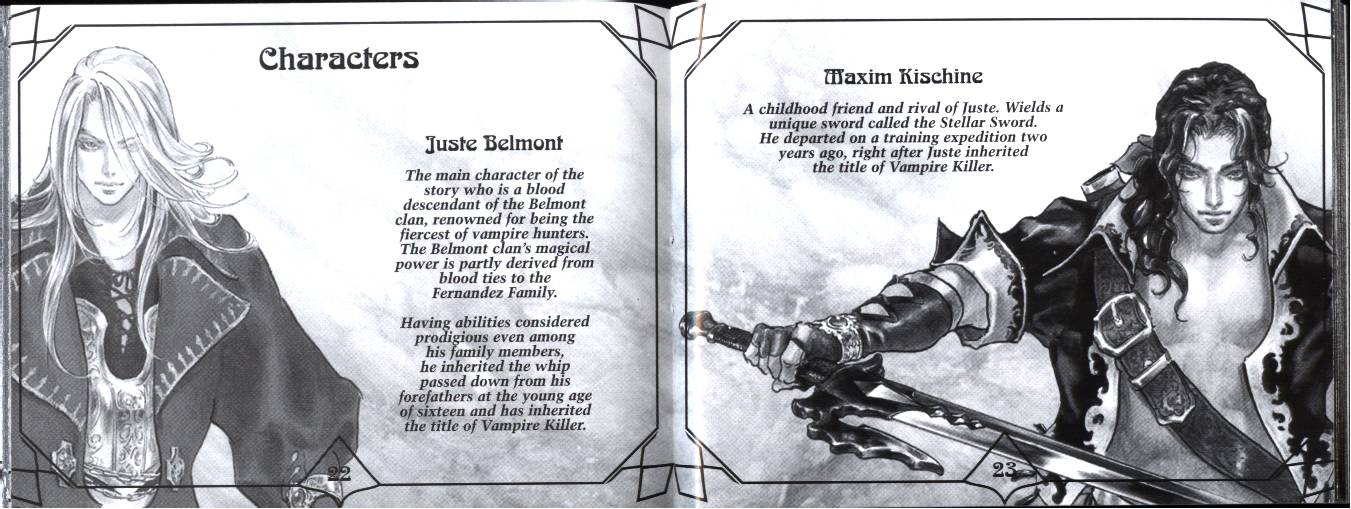